Get Started
Setup and First Steps
A step-by-step guide to install Macro Handler and run your first macro. Permissions, setup, and first-run flow in one place.
Android release link: current public package
The Android button opens the current Macro Handler package. Installation, permissions, and first-run disclosures are completed through the in-app onboarding flow and this guide.
First-run visual map
First-run learning map: from setup to first macro
A first-time user learns what the product does on the welcome screen, which system permissions are required on the permission panel, and where to create the first macro on the dashboard.
First-run learning map: welcome
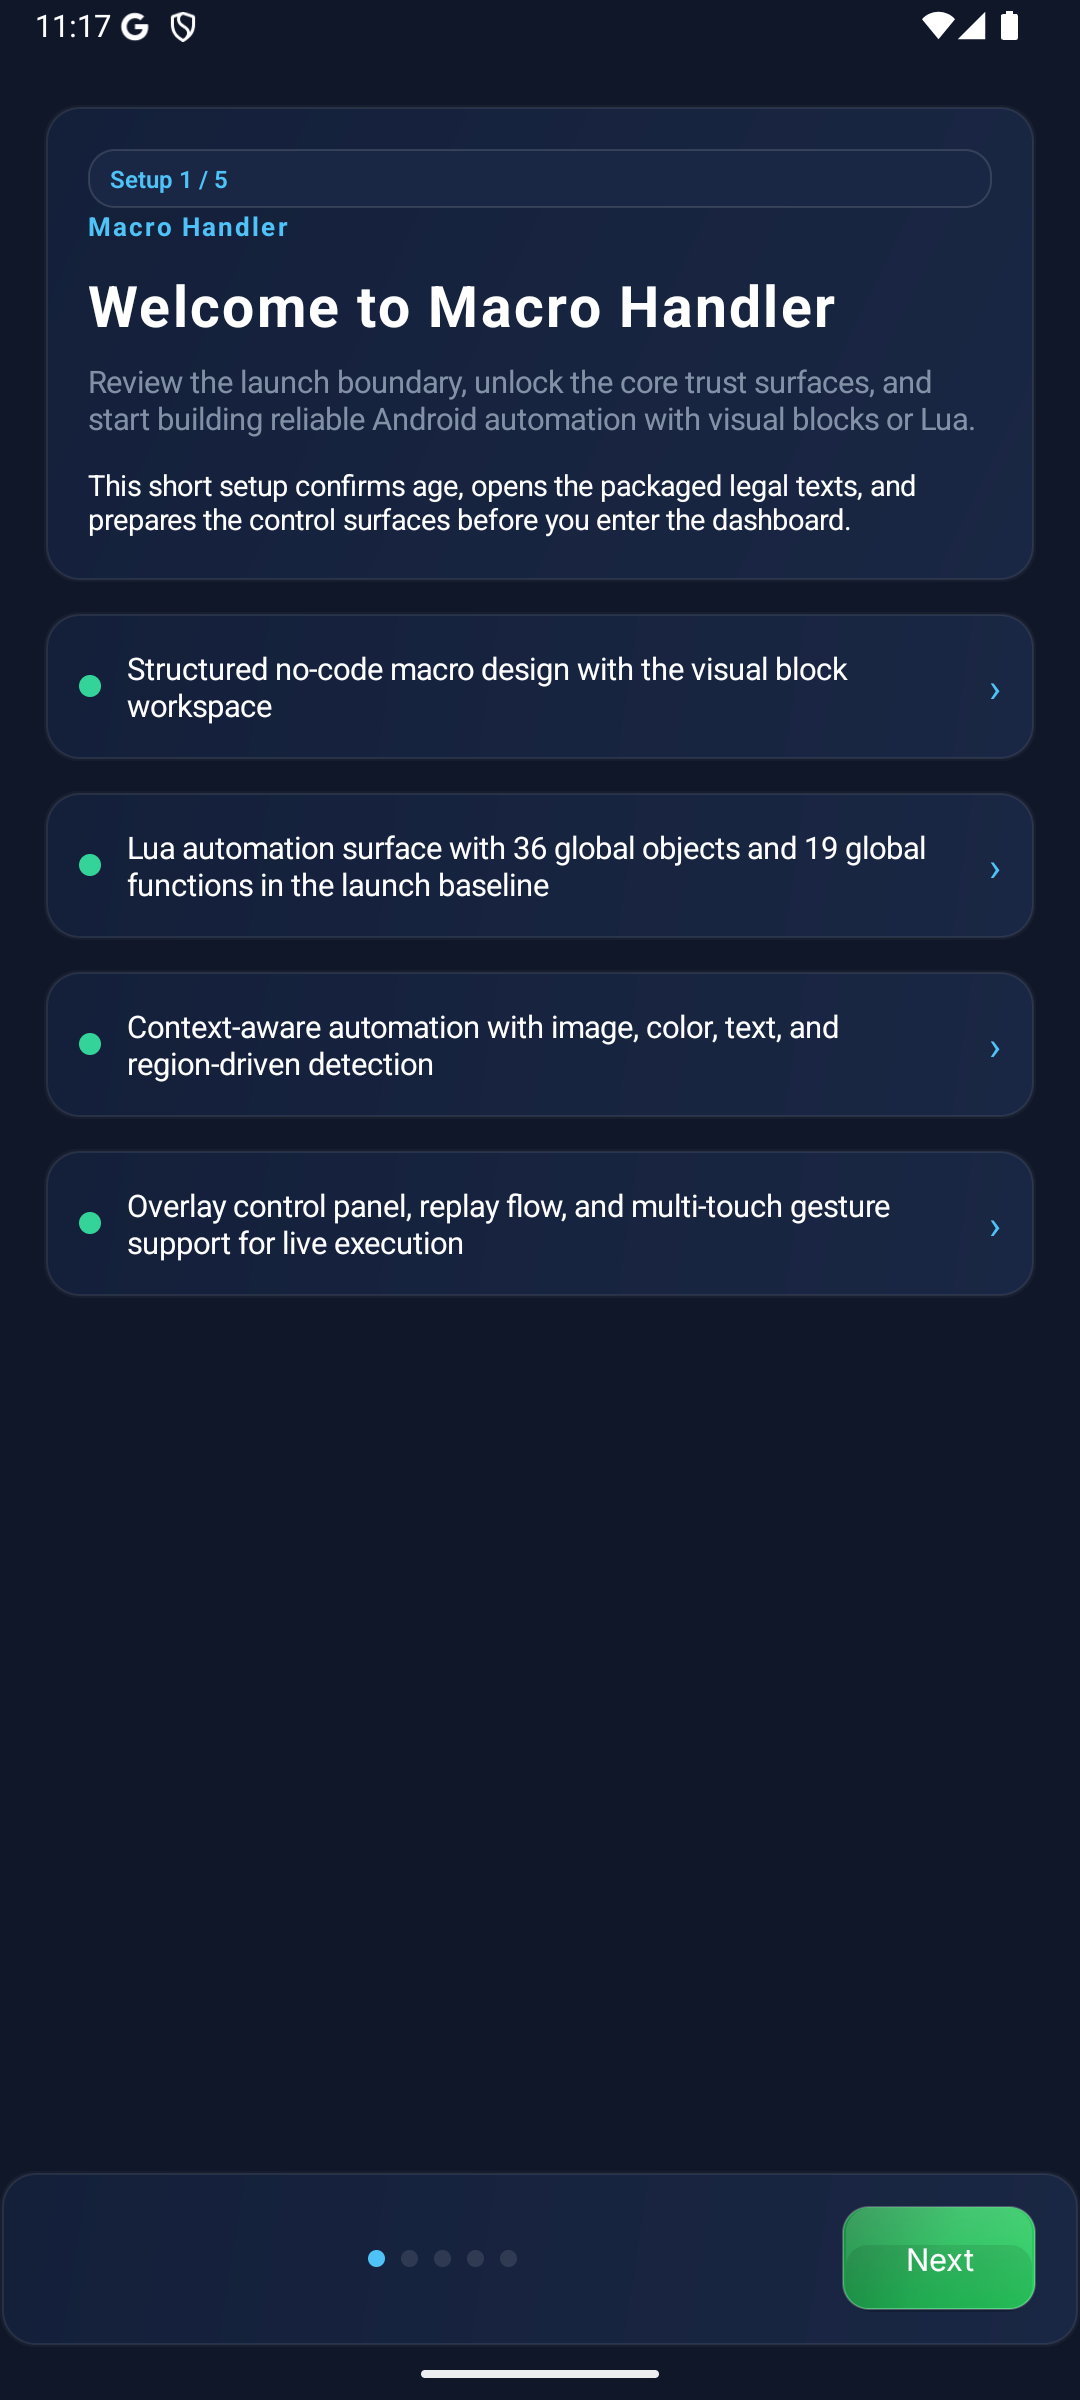
The first screen connects product scope, the start decision, and the next setup steps for the user.
First-run learning map: permissions
The permission screen teaches the system rights required for macros to see the screen and execute touch actions.
First-run learning map: first macro
The dashboard explains where users see existing macros and which action creates a new macro.
Install the App
The Android button opens the current Macro Handler package. After installing it, use this guide to complete first launch, permissions, and dashboard readiness. The first screen explains what the product does, which automation surfaces it covers, and which first-run steps come next.
- Structured no-code macro design with the visual block editor
- Lua automation with 700+ API methods and 52 global objects in the launch baseline
- The 700+ API methods claim applies to the default launch Lua runtime. Lua 5.4.8 native runtime remains experimental and is not the production default until the cutover gate passes.
- 70 official OCR language codes map to 7 OCR recognizer families: Latin, Chinese, Japanese, Korean, Devanagari, Arabic, and Cyrillic. Latin, Chinese, Japanese, Korean, and Devanagari use ML Kit recognizer packages; Arabic and Cyrillic use bundled Tesseract data for offline fallback. For scripts outside the official OCR coverage or rapidly changing glyph shapes, prefer template or image flows.
- Operational runtime surface with overlay controls, replay, and managed sharing
Welcome
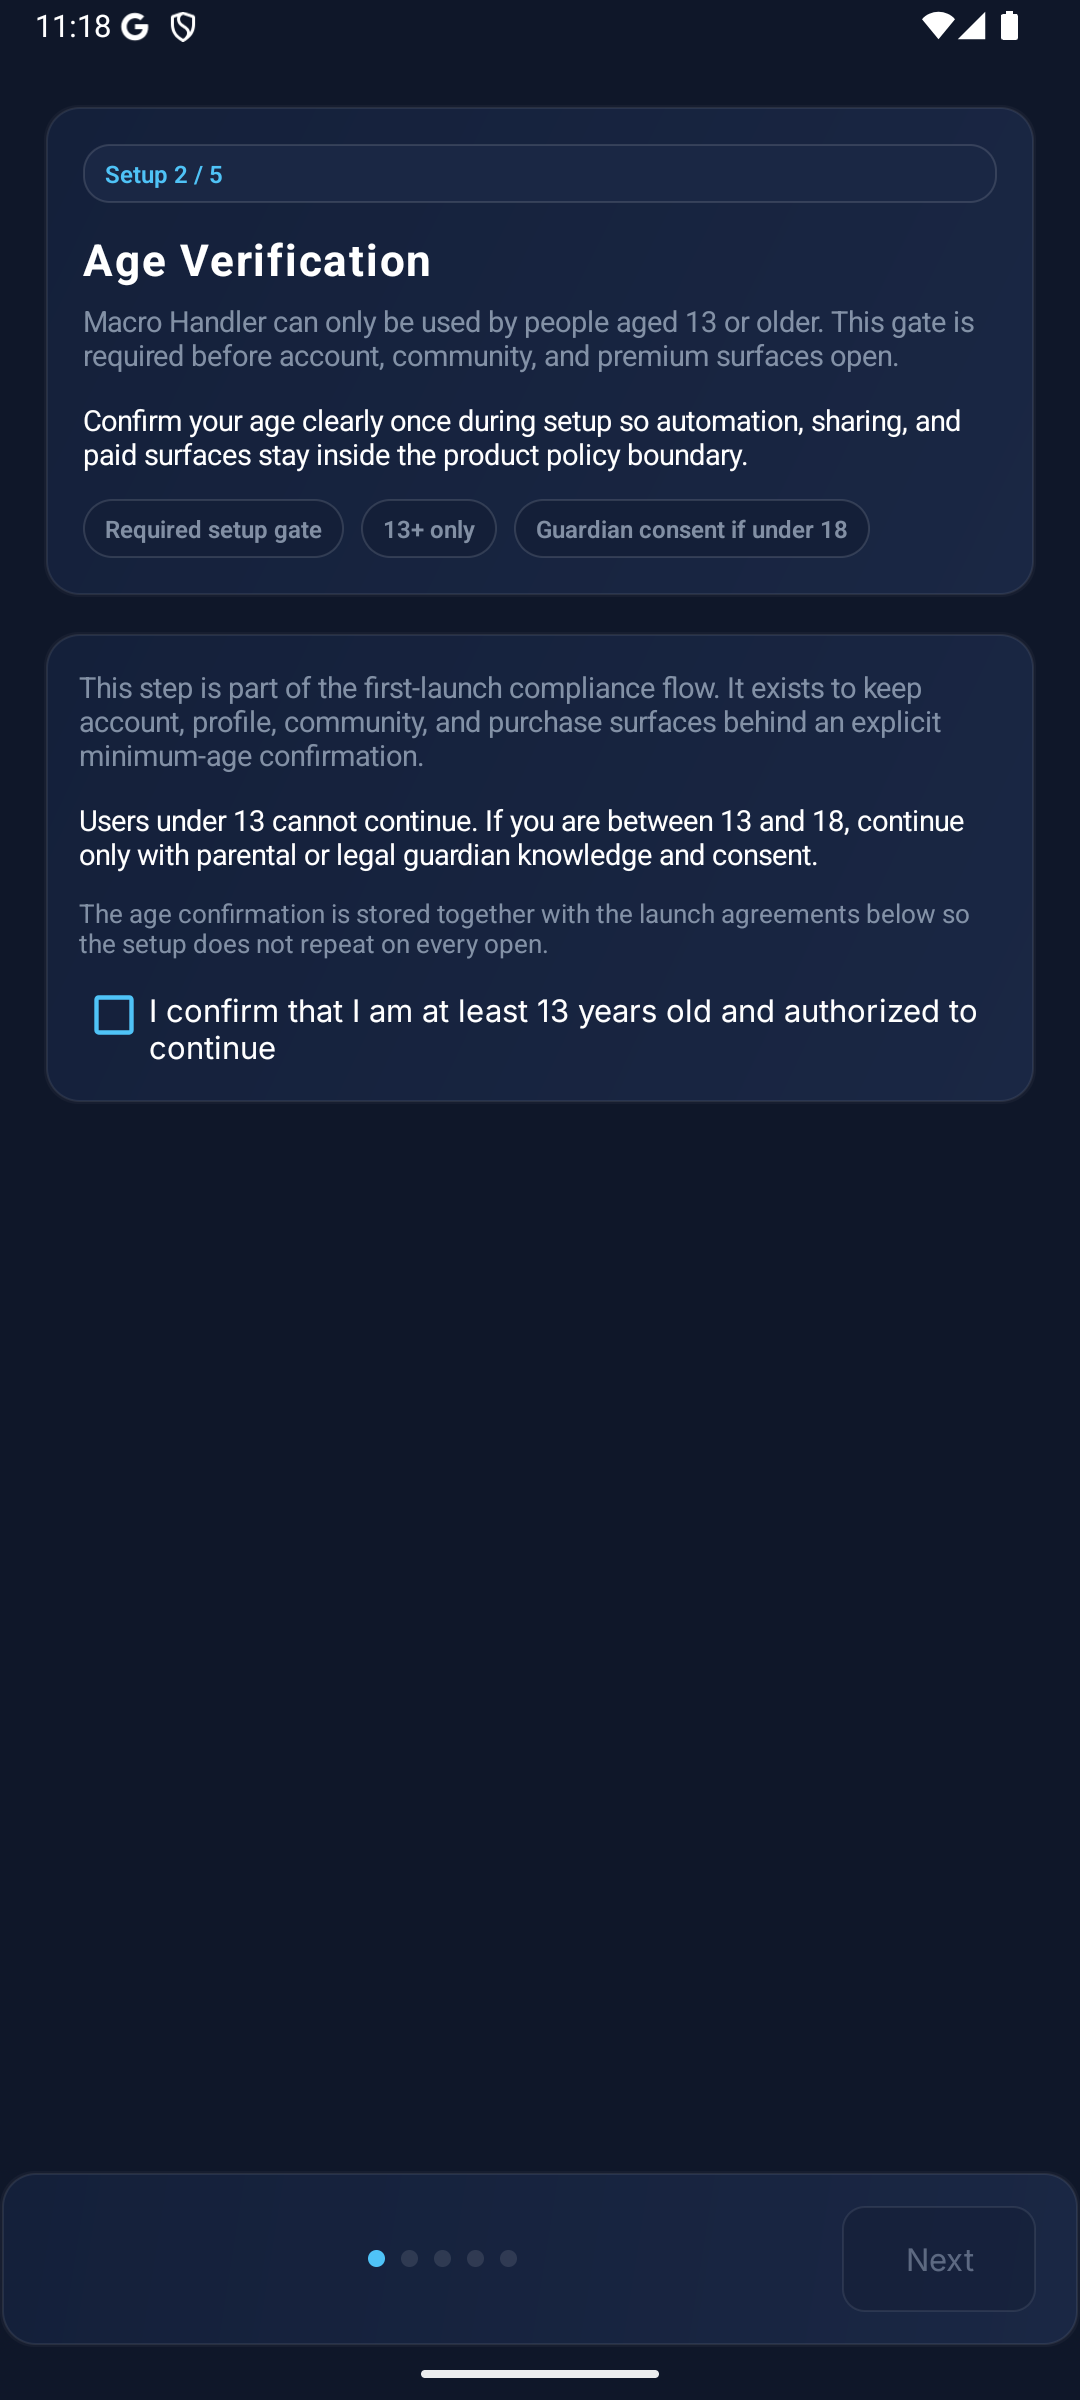
Age Verification
Complete Age Confirmation
On first launch, Macro Handler requires a clear minimum-age confirmation. This step keeps account, community, sharing, and premium surfaces behind an explicit product-policy gate. Users under 13 cannot use the app, and users between 13 and 18 should continue only with parental or legal-guardian knowledge and consent.
- This confirmation is a required part of first launch and is not turned into a repetitive prompt.
- The age confirmation is recorded together with the privacy and product agreements that follow.
- Age confirmation and formal agreement review stay grouped inside one clear first-run sequence.
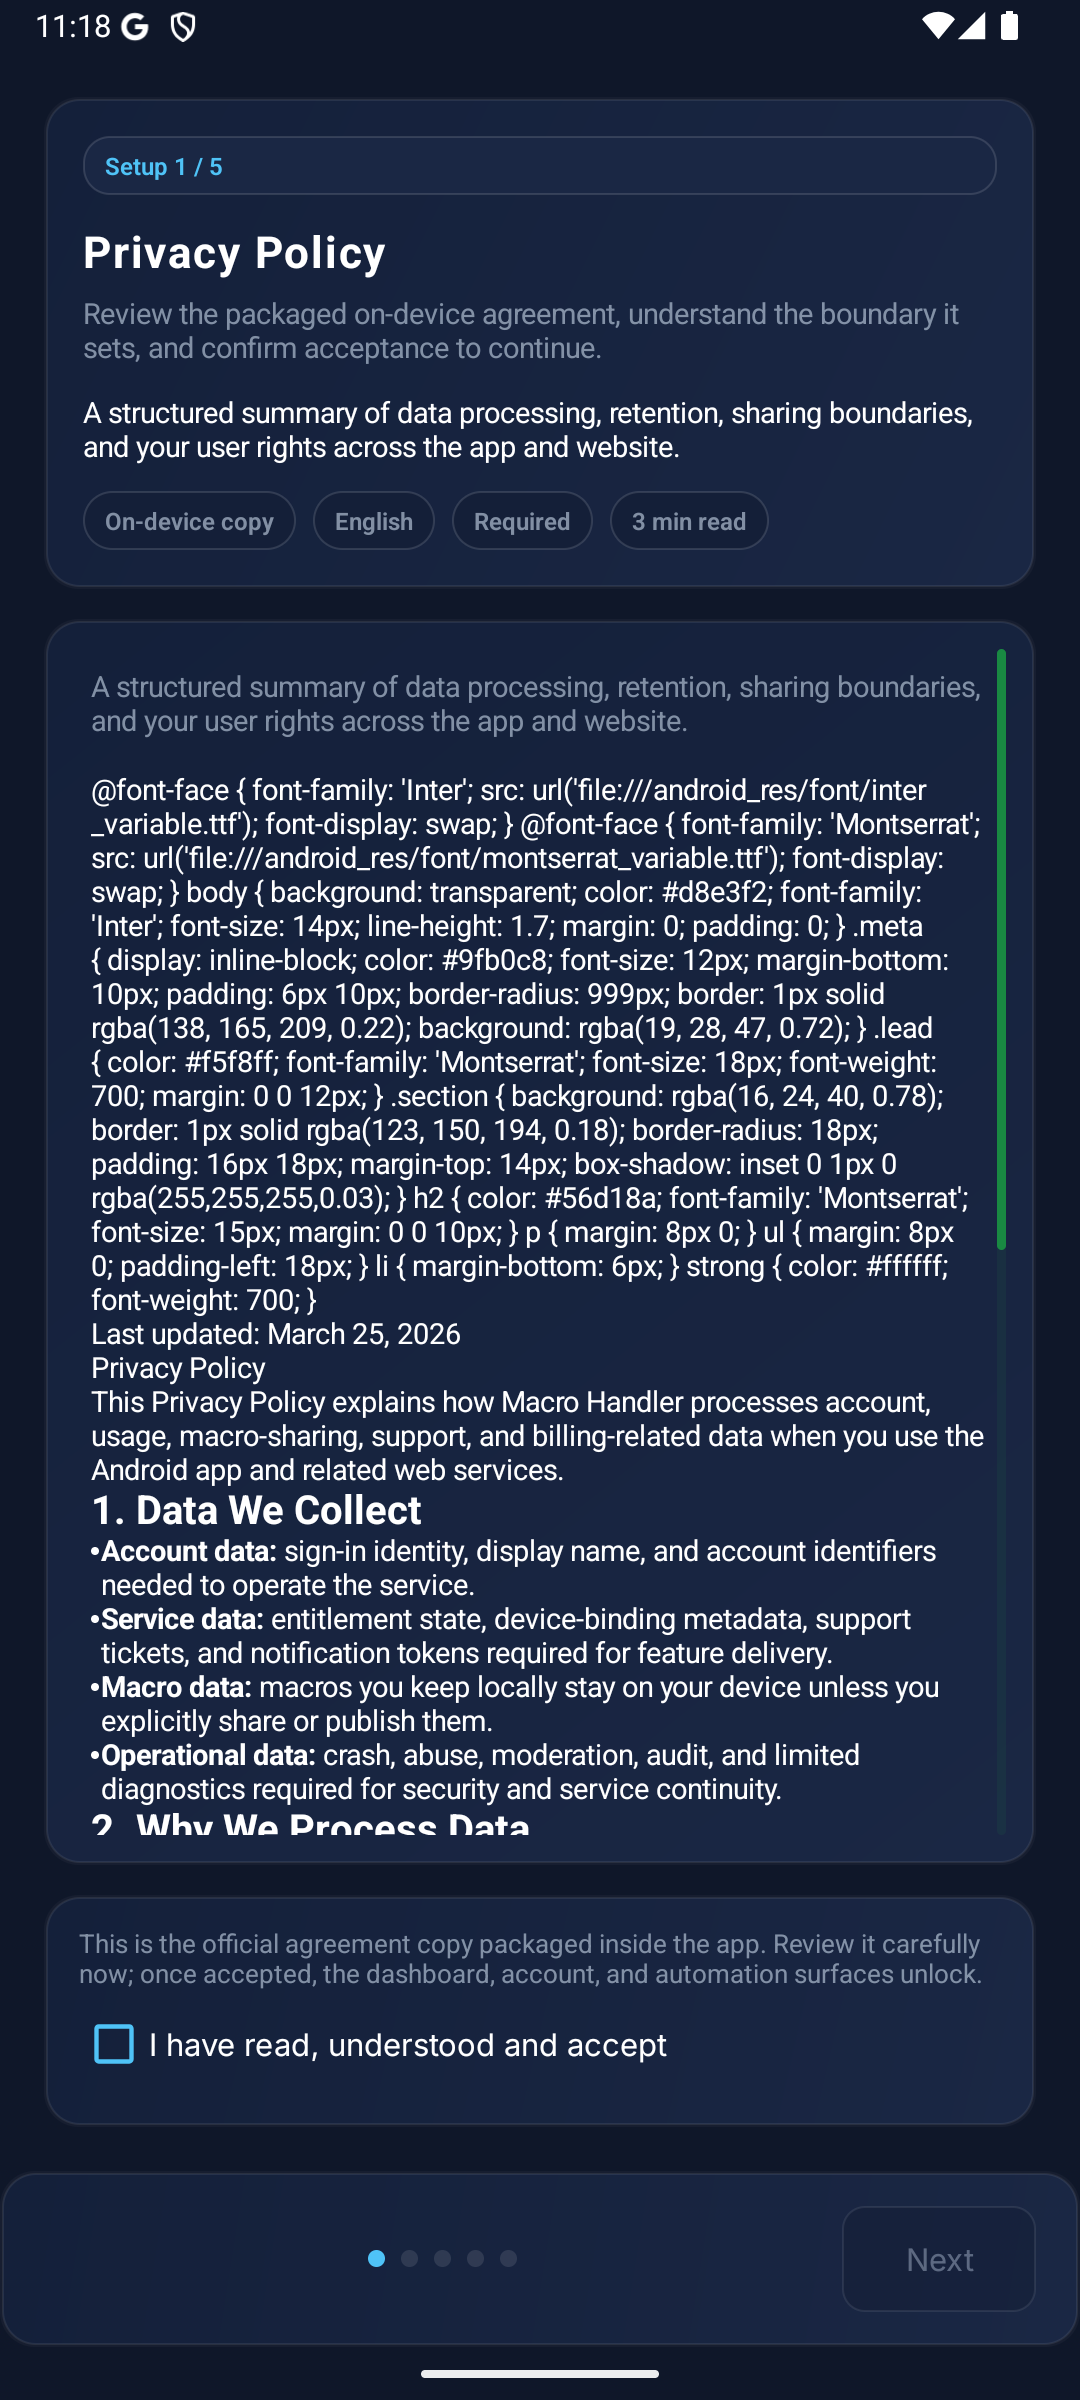
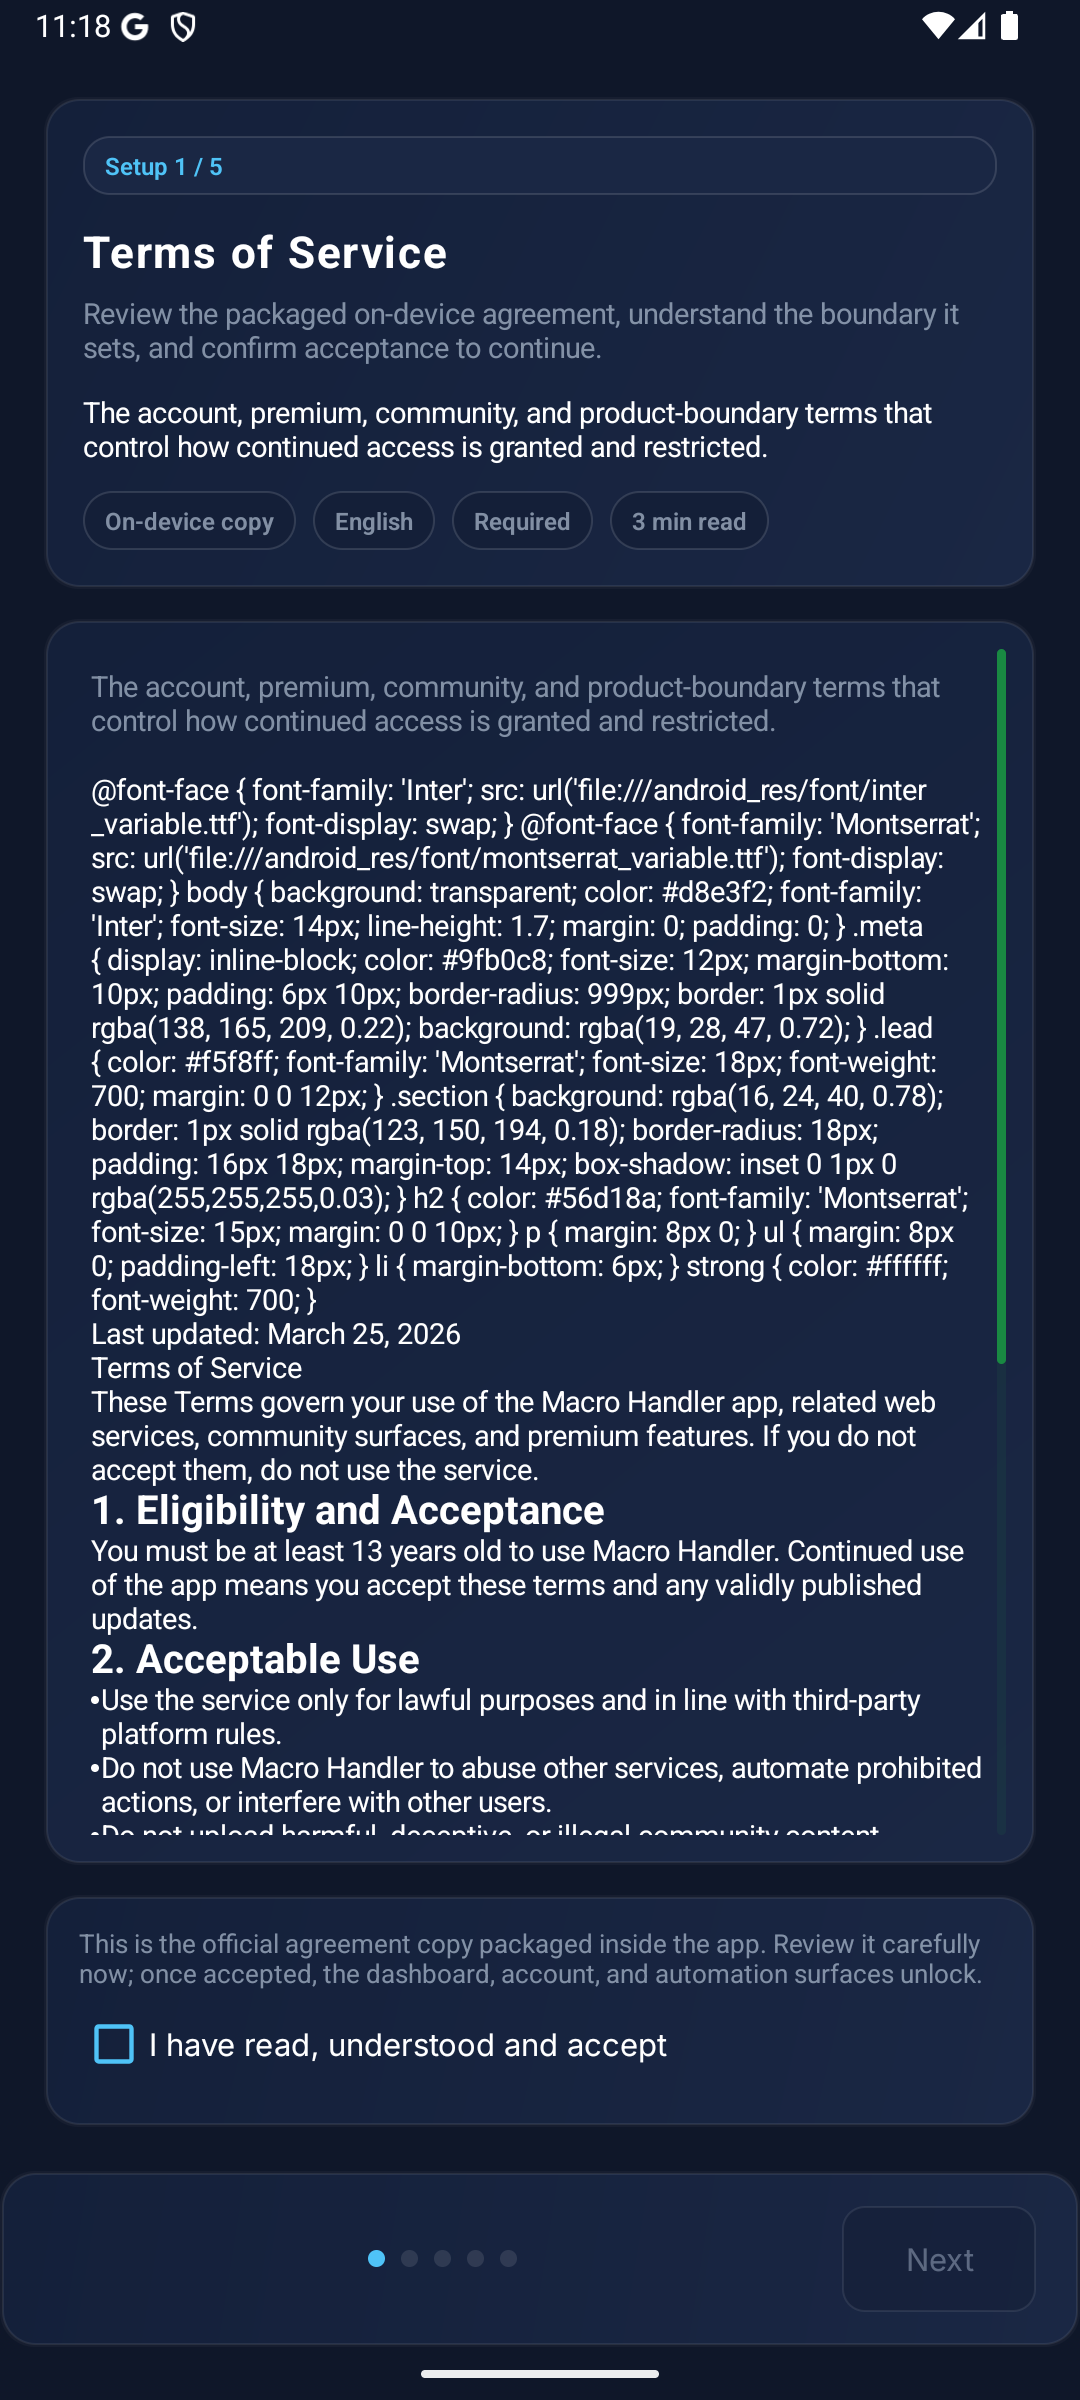
Accept Agreements
The Privacy Policy, Terms of Service, and EULA are shown as the official packaged copies inside the app. This is a one-time step that does not repeat on later launches. It is where the data-processing boundary, product-use rules, license framework, and the conditions behind premium or community surfaces are stated clearly.
- Privacy Policy: How your personal data is protected
- Terms of Service: Usage rules of the application
- EULA: End User License Agreement
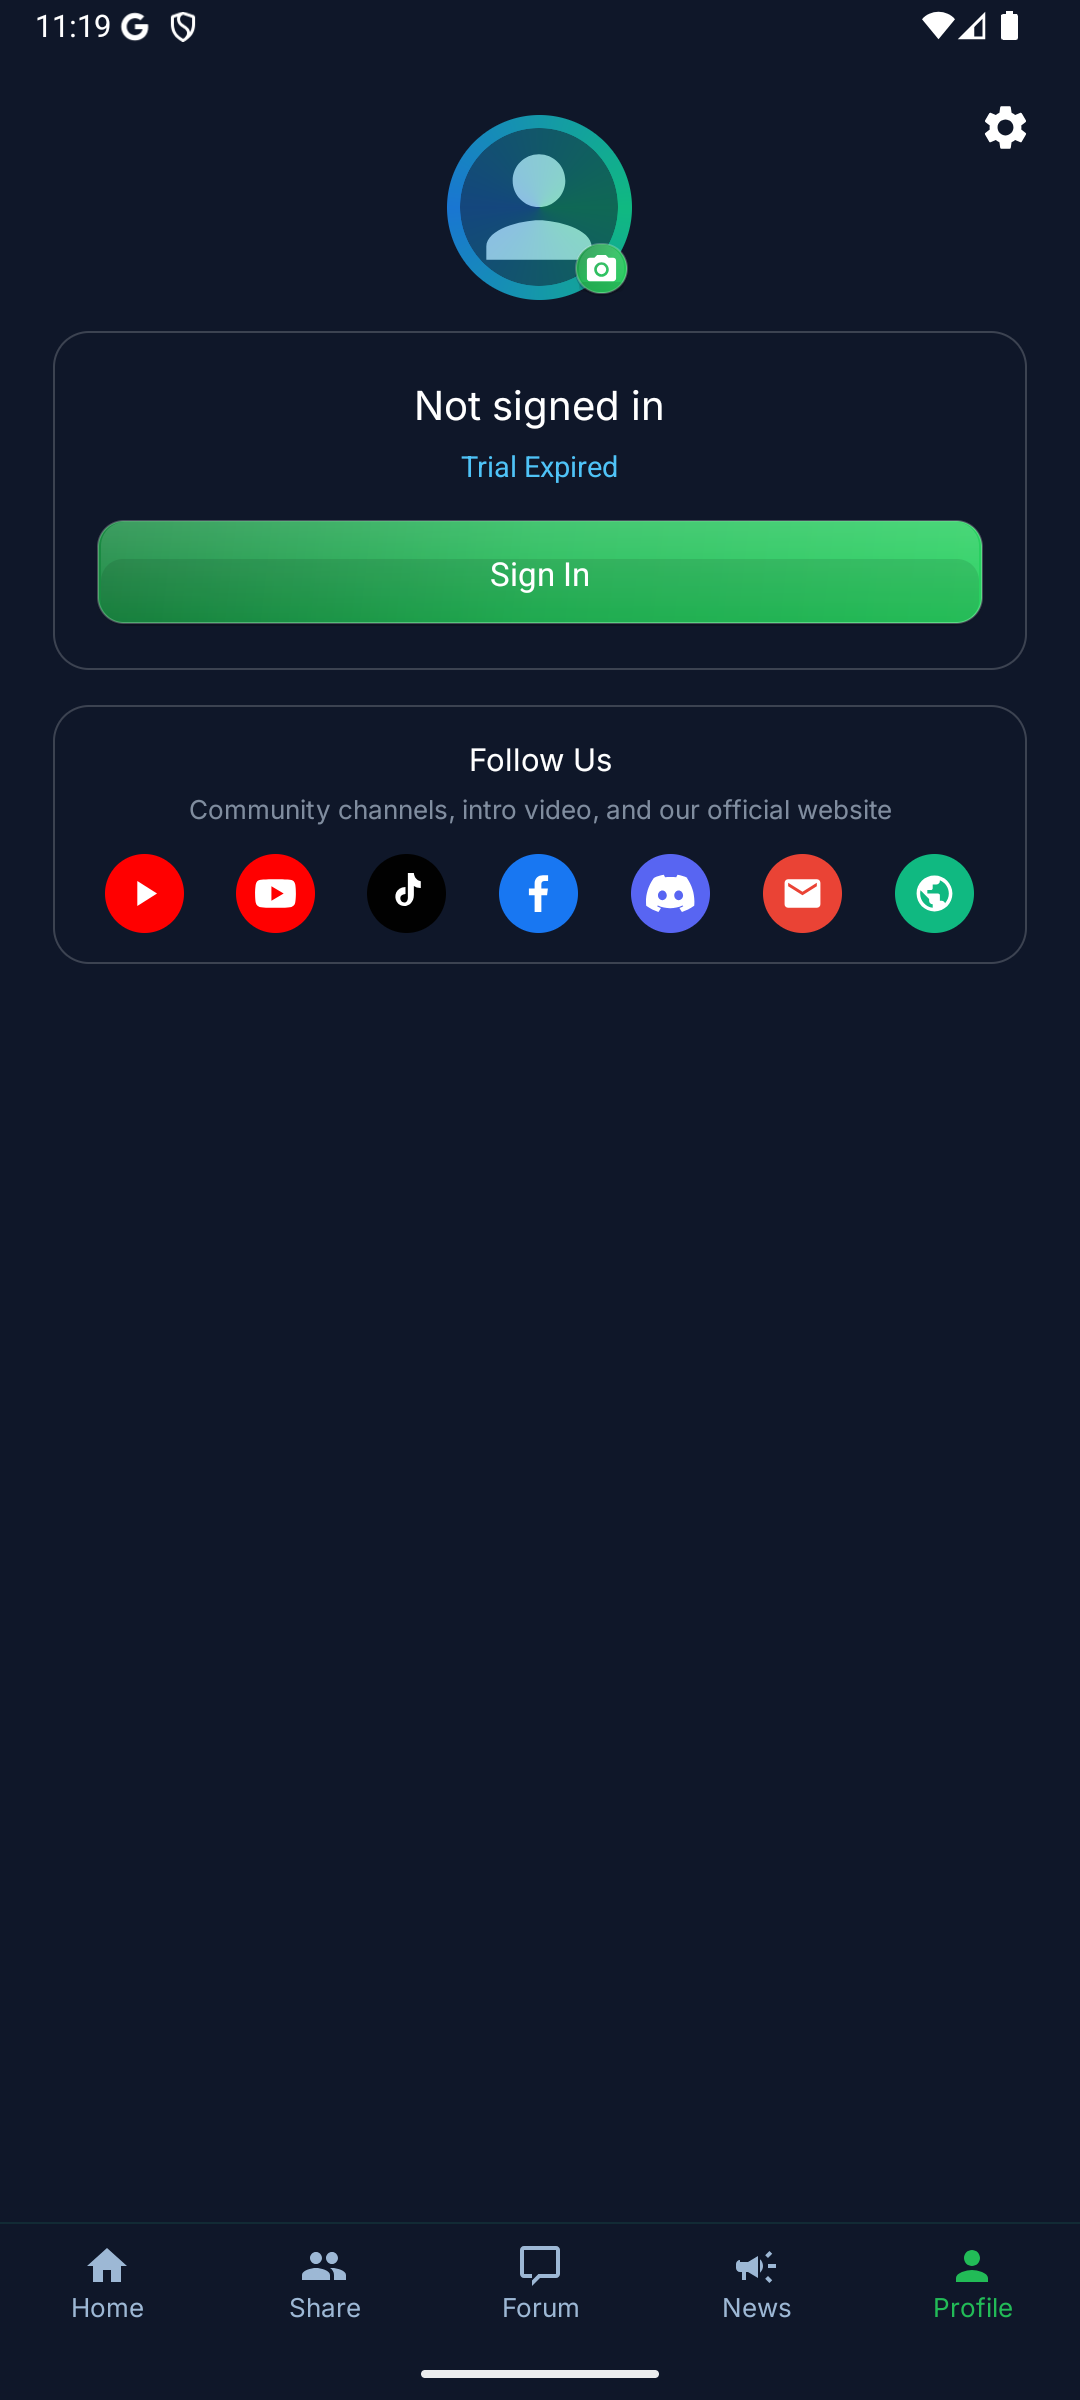
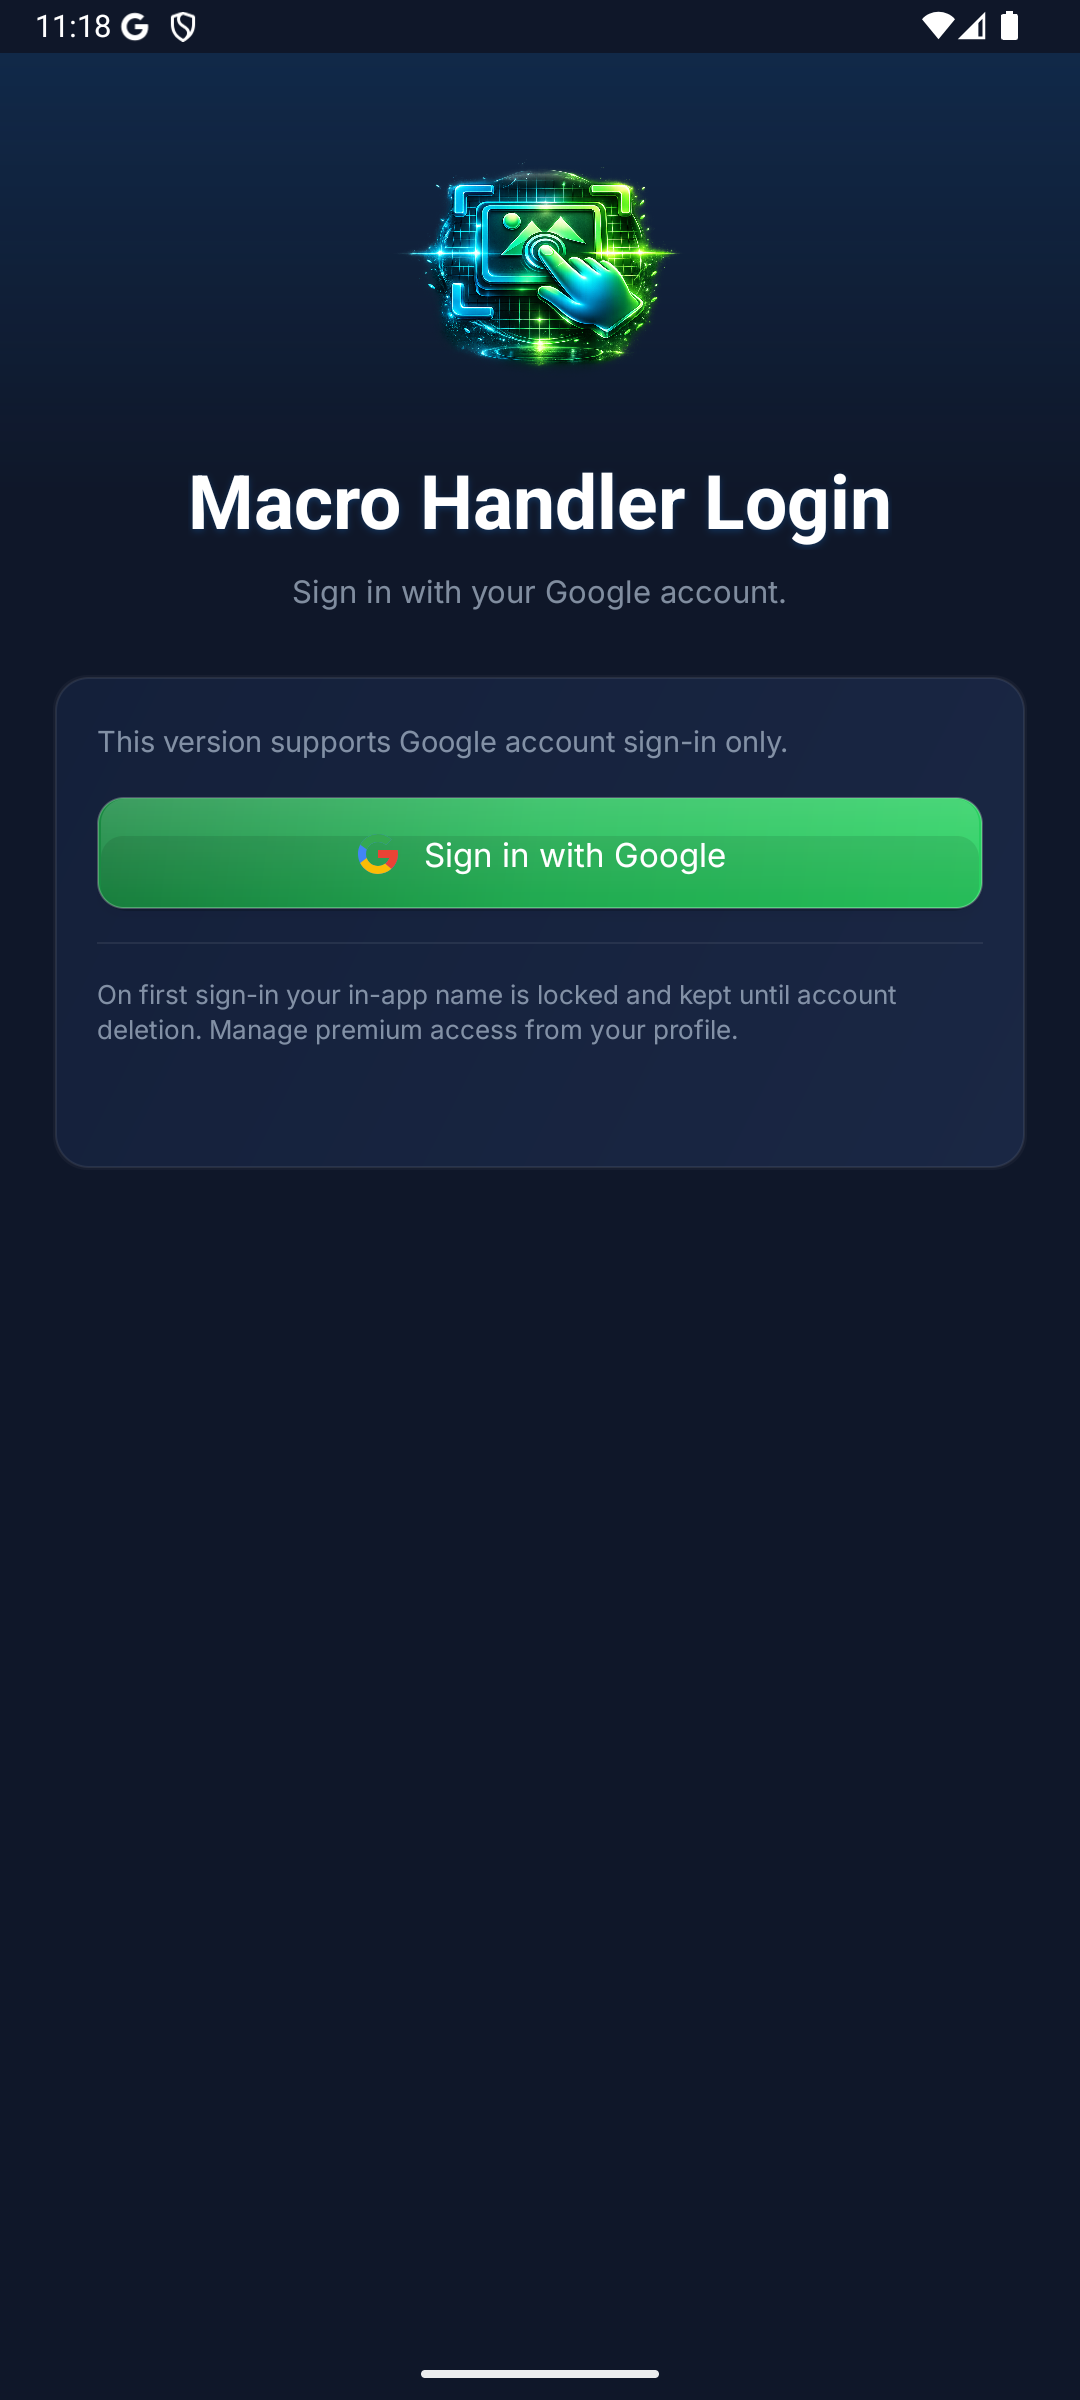
Sign In
Sign in securely with one tap using your Google account. Trial access starts in a bootstrap mode after sign-in, and the full trial window is confirmed after the first secure server verification. Track your account status, license type, and remaining time from the Profile tab.
- Secure one-tap sign in with Google
- License status and time tracking in Profile tab
Profile
Sign In
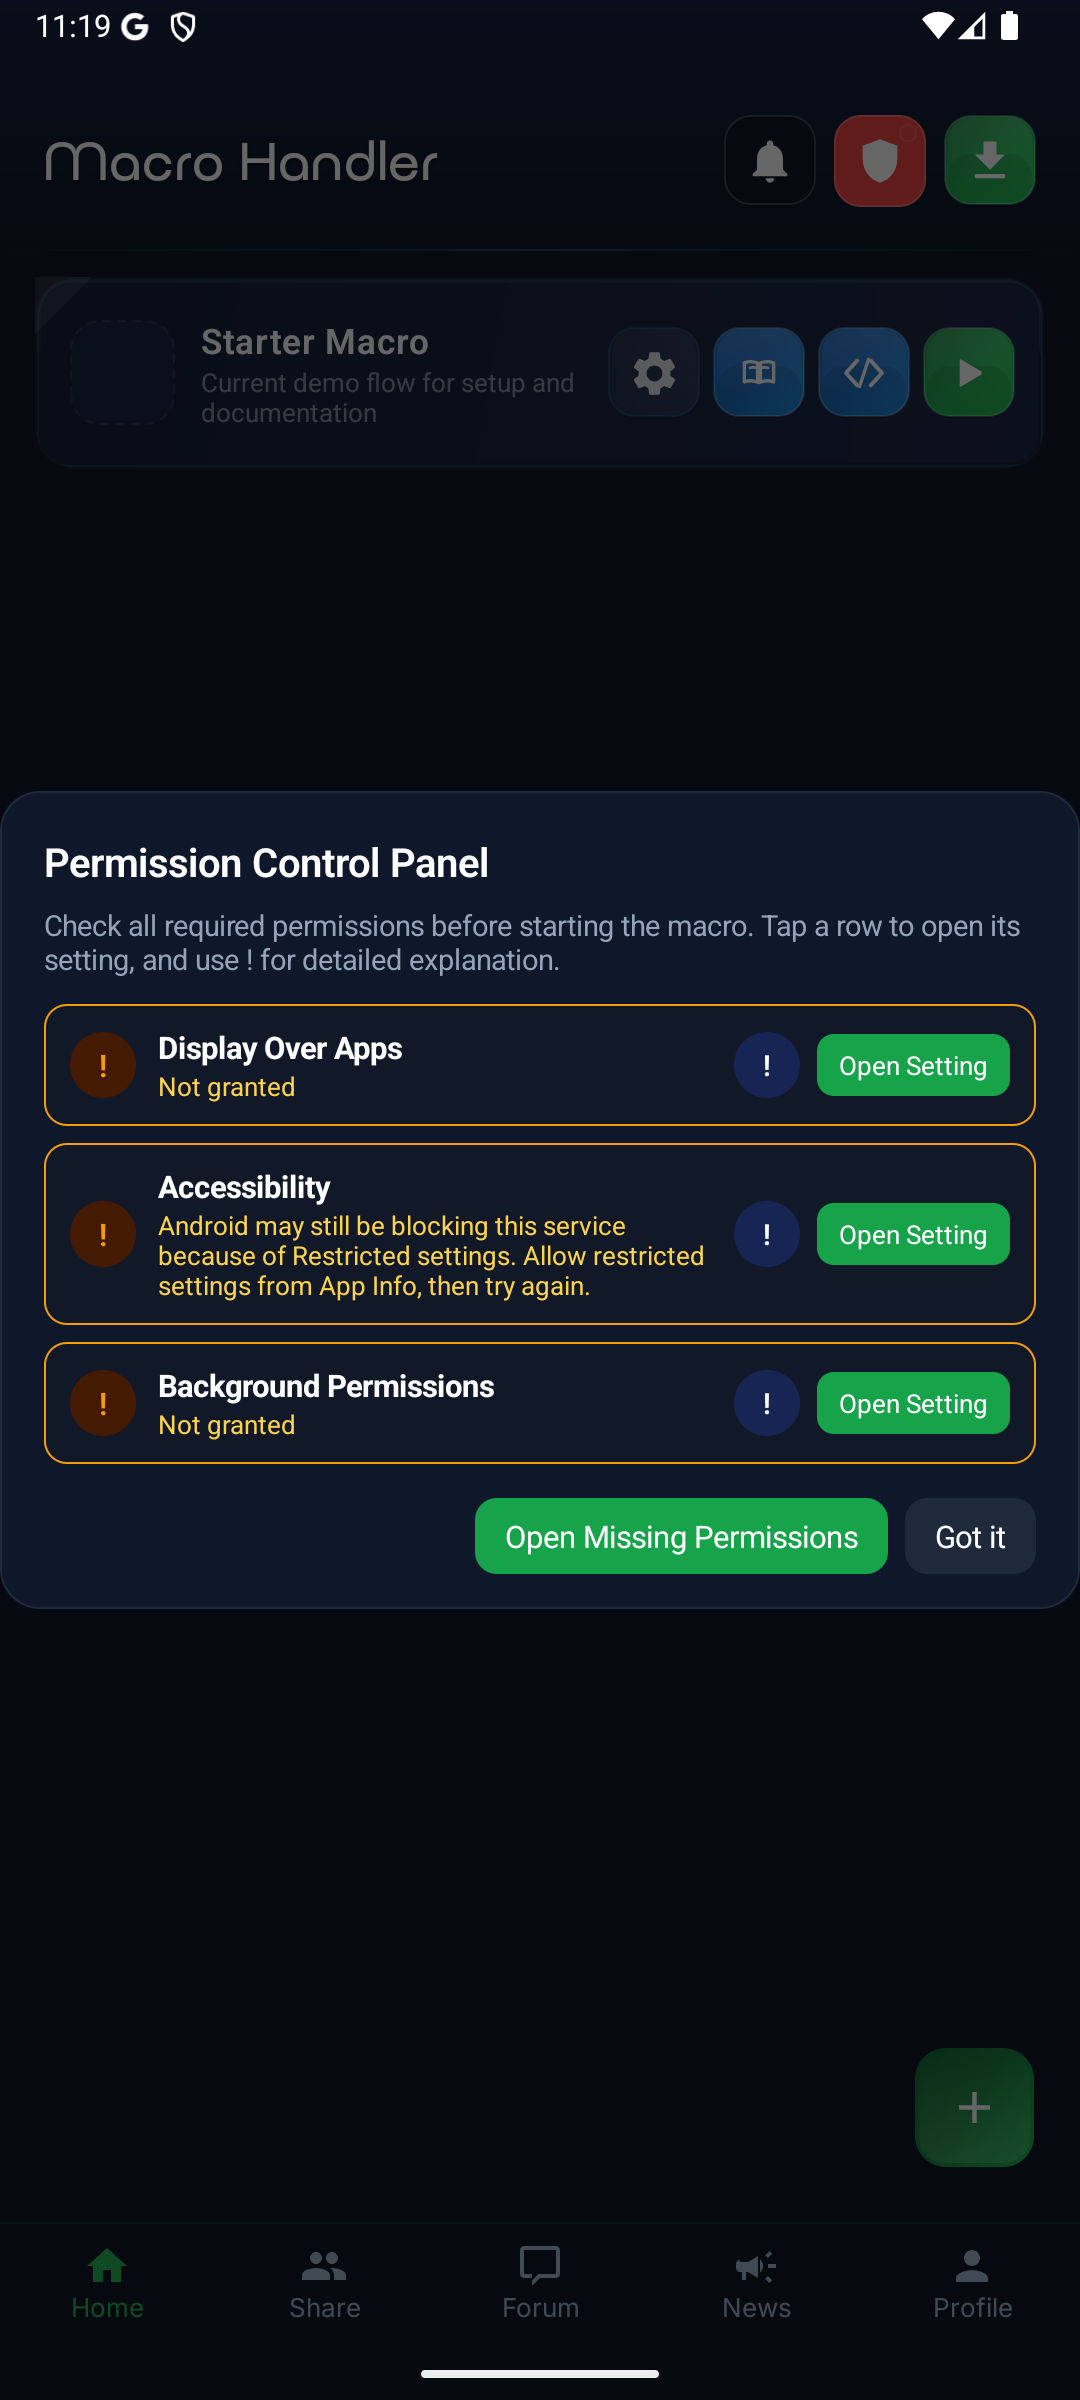
Grant Permissions
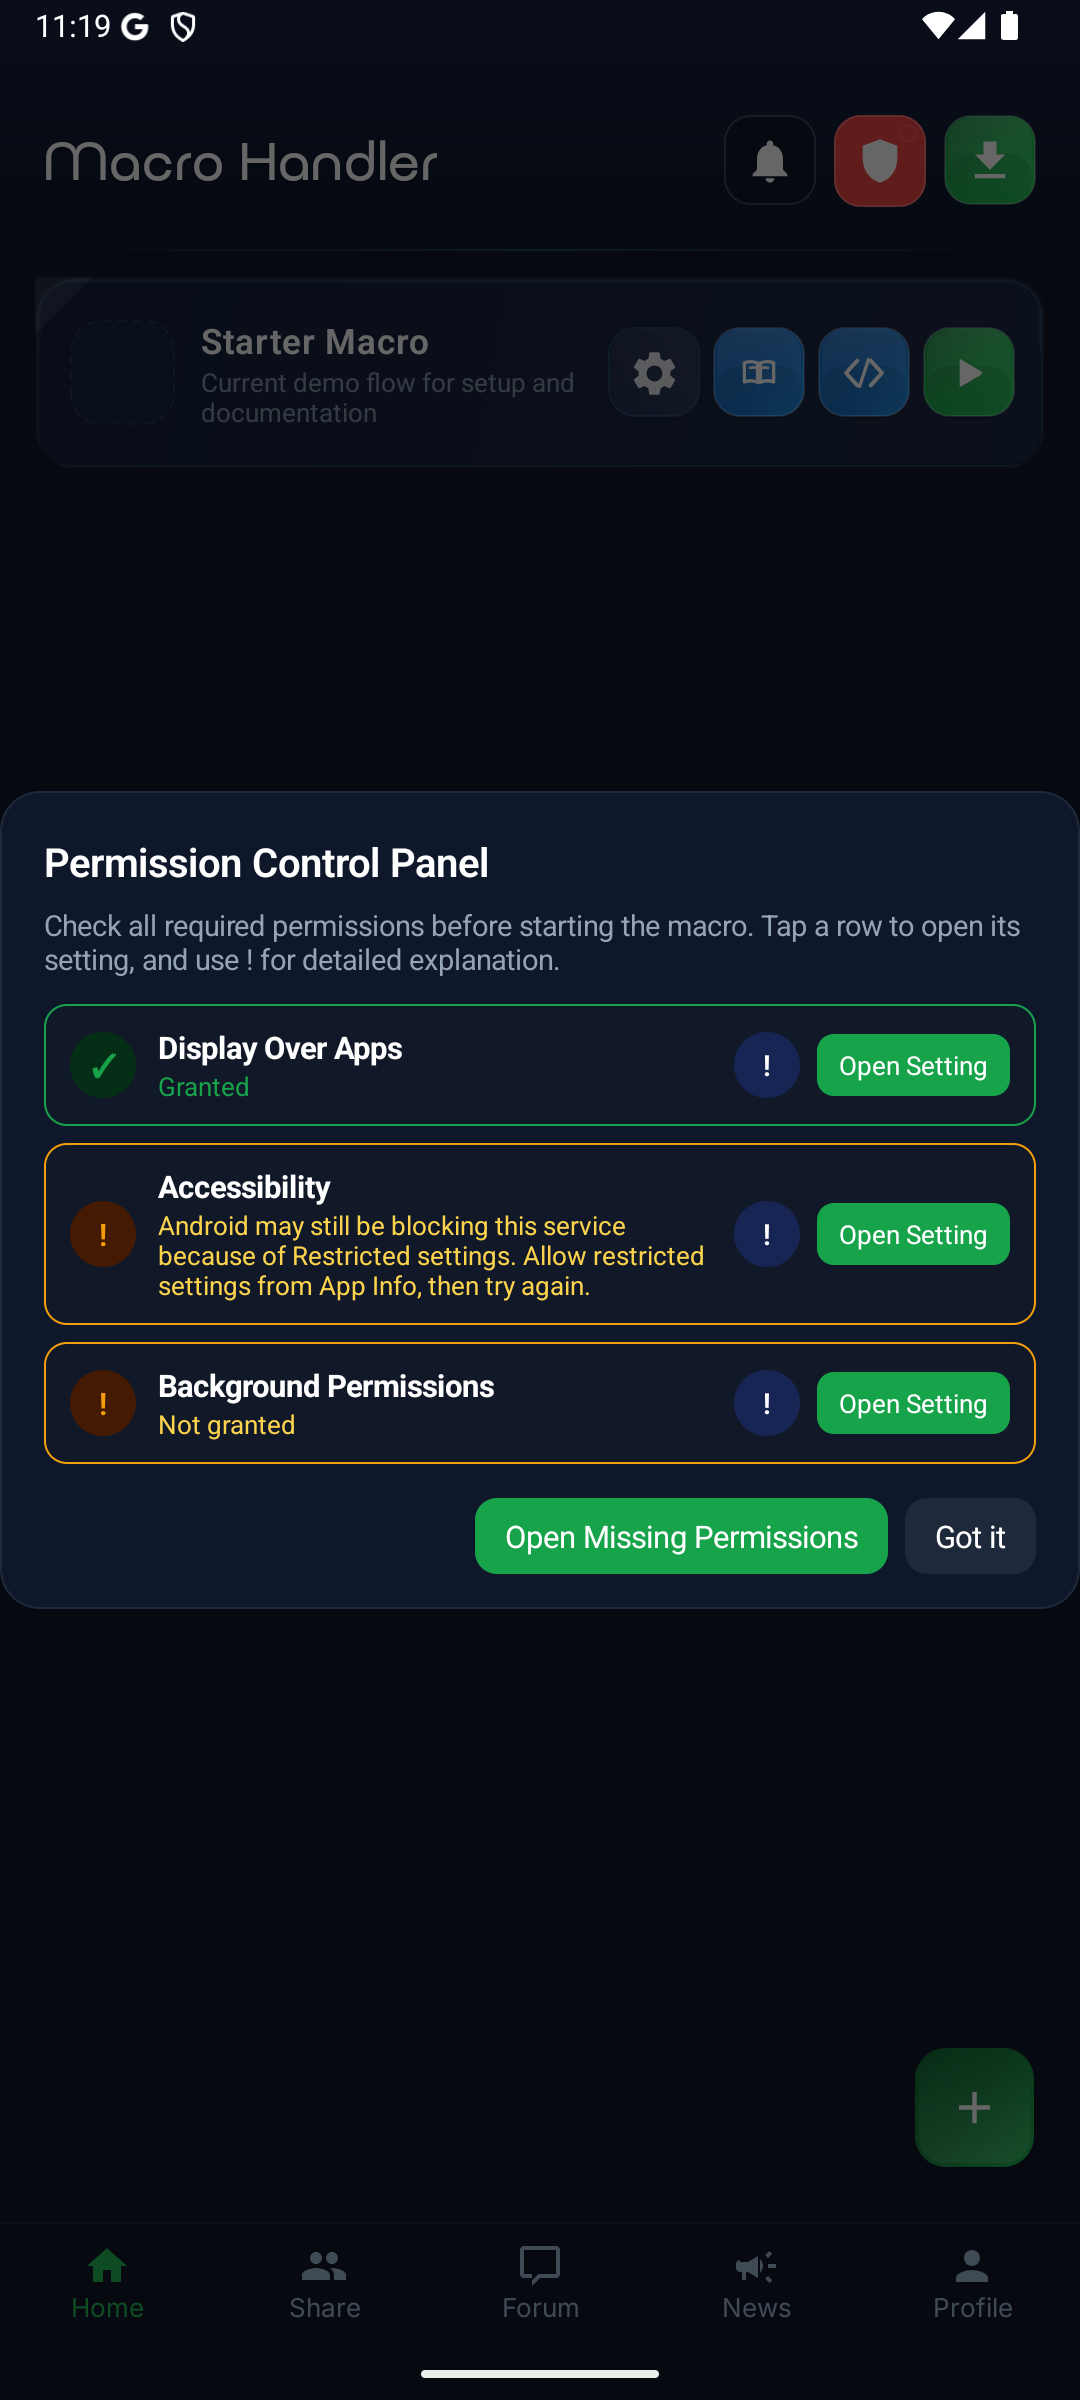
Two critical permissions are required for macros to work: Display Over Other Apps and Accessibility Service. Without these, macros cannot see the screen or perform touch actions. The app will guide you step by step.
Permission Required Screen
Permission Progress
Screen 1
Permission Check Panel
The first screen is the in-app permission check panel. It combines the missing permission state, the explanation entry point, and the jump to the relevant Android setting.
Screen 2
Progress and Return Check
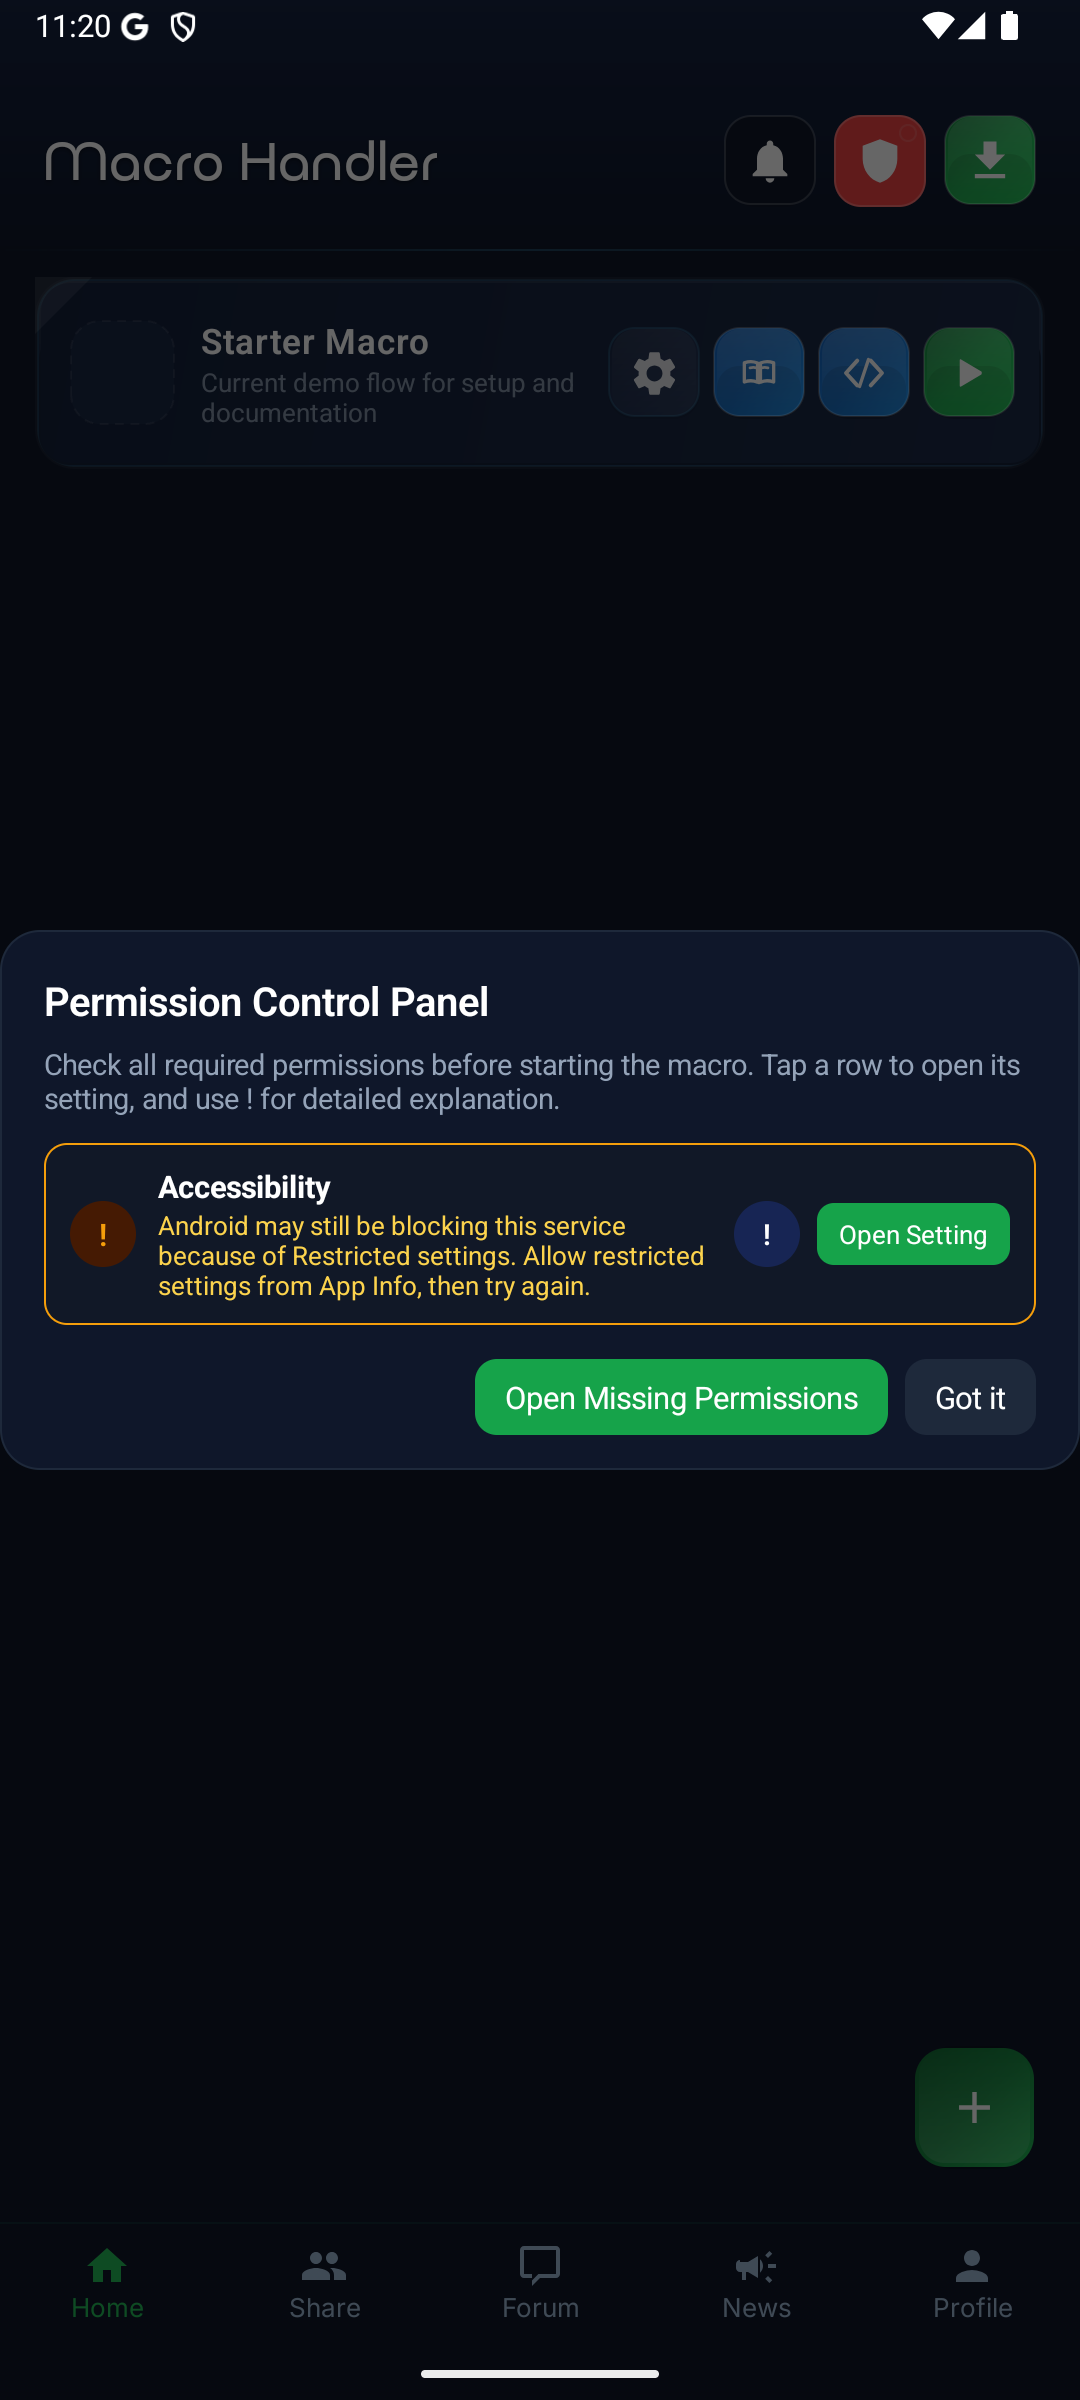
After you enable a permission in Android and return to the app, the same panel reevaluates which steps are complete and which items still need action.
Display Over Other Apps (Overlay)
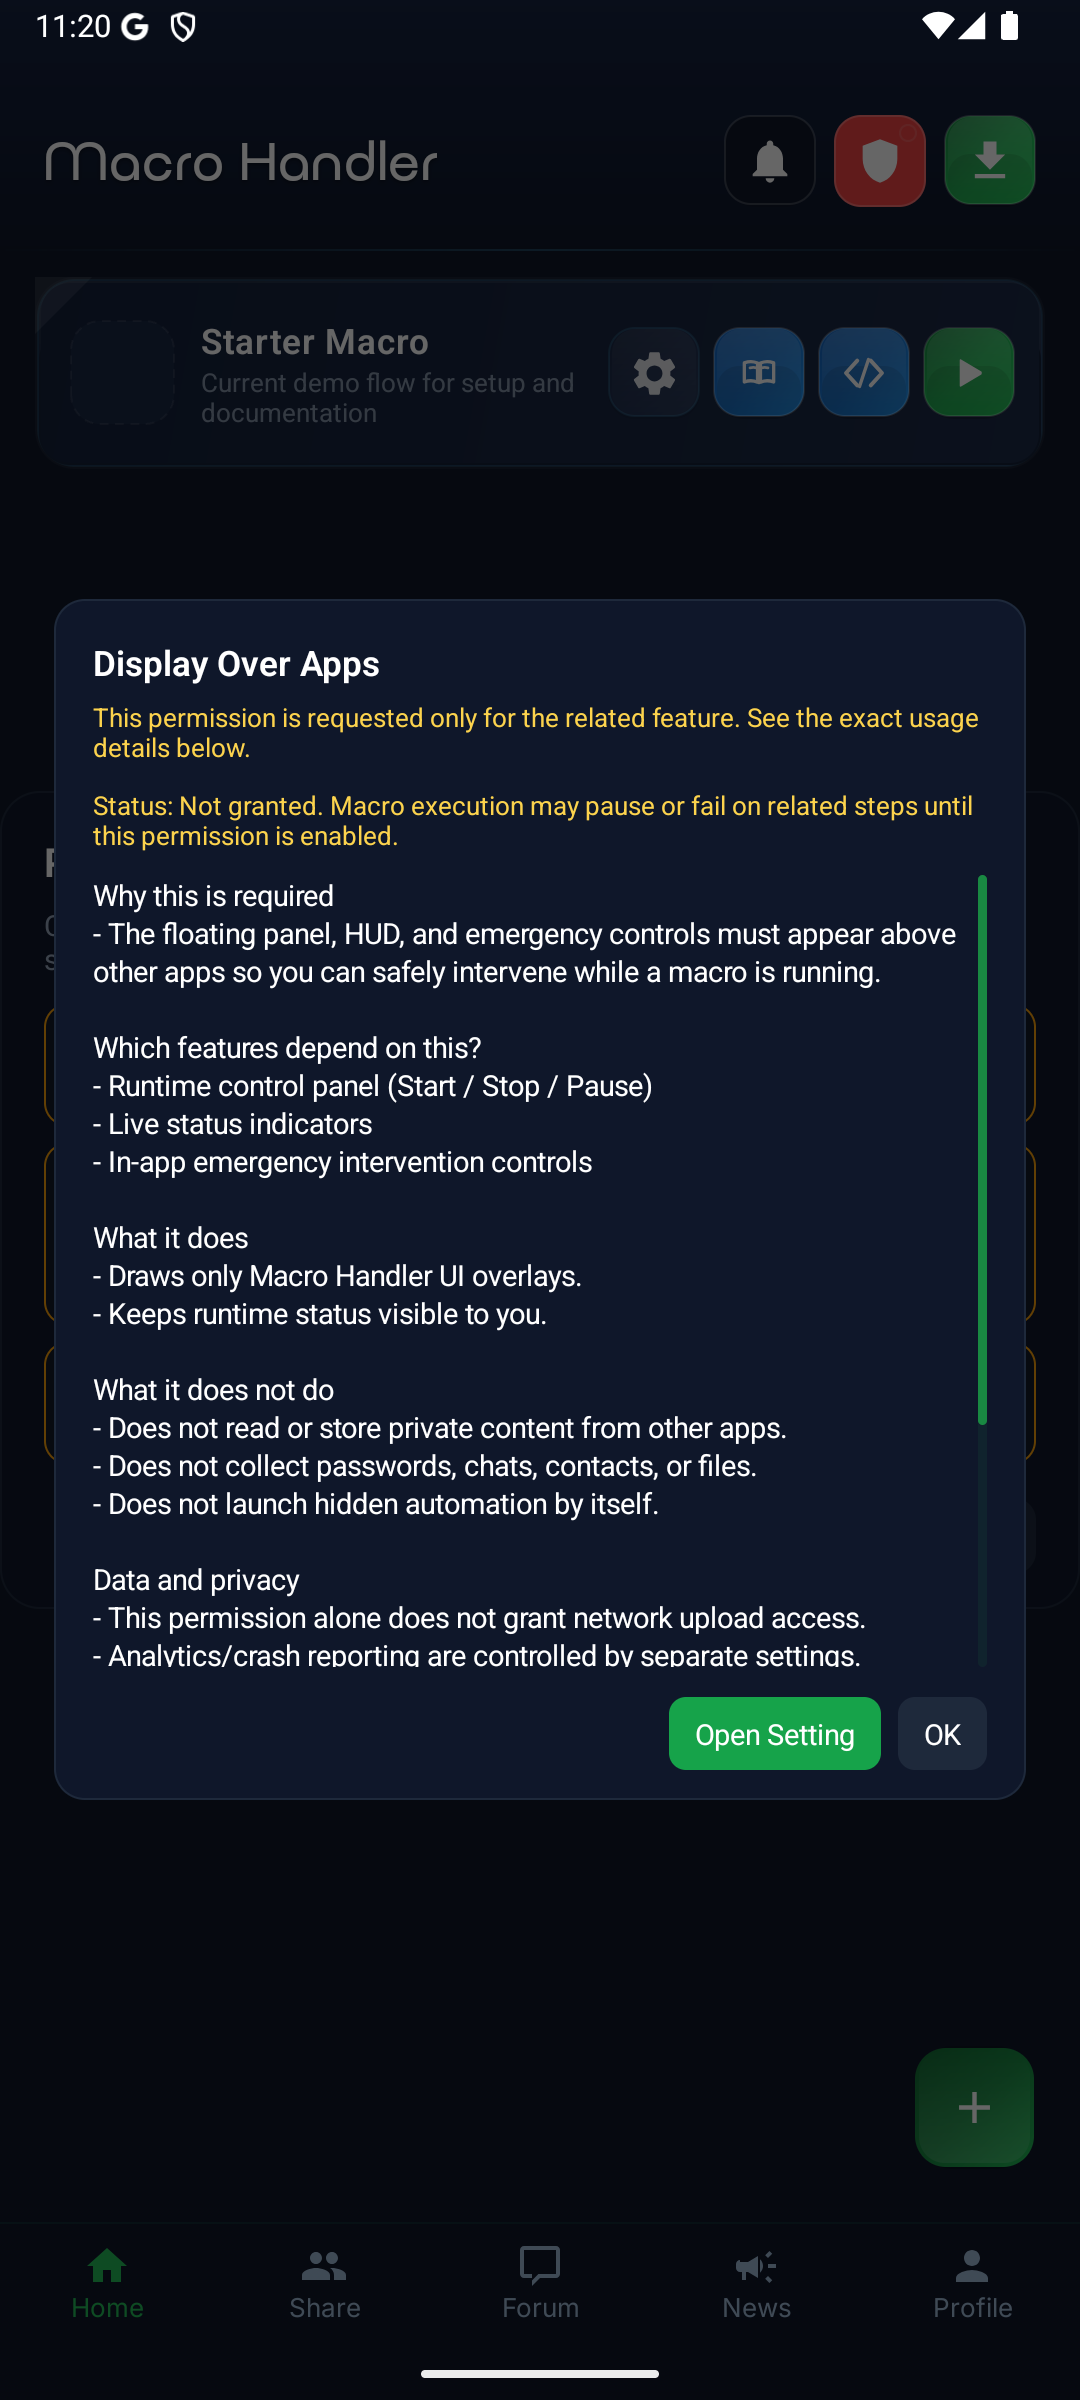
Required for the control panel, HUD overlay, and helper tools. This permission allows floating buttons and info panels to appear on screen while macros run. The app directs you to Android settings. On some Android builds the Macro Handler entry and the permission switch appear on the same screen, while other devices open the app-specific page first and enable the permission there.
Overlay Guidance
Disclosure
Detailed Guidance

Accessibility Service
Required to analyze screen content, detect images, and perform touch automation. First review the in-app permission disclosure, then enable the Macro Handler service from Android accessibility settings. Your device may show an additional Android warning before activation; confirm it to continue.
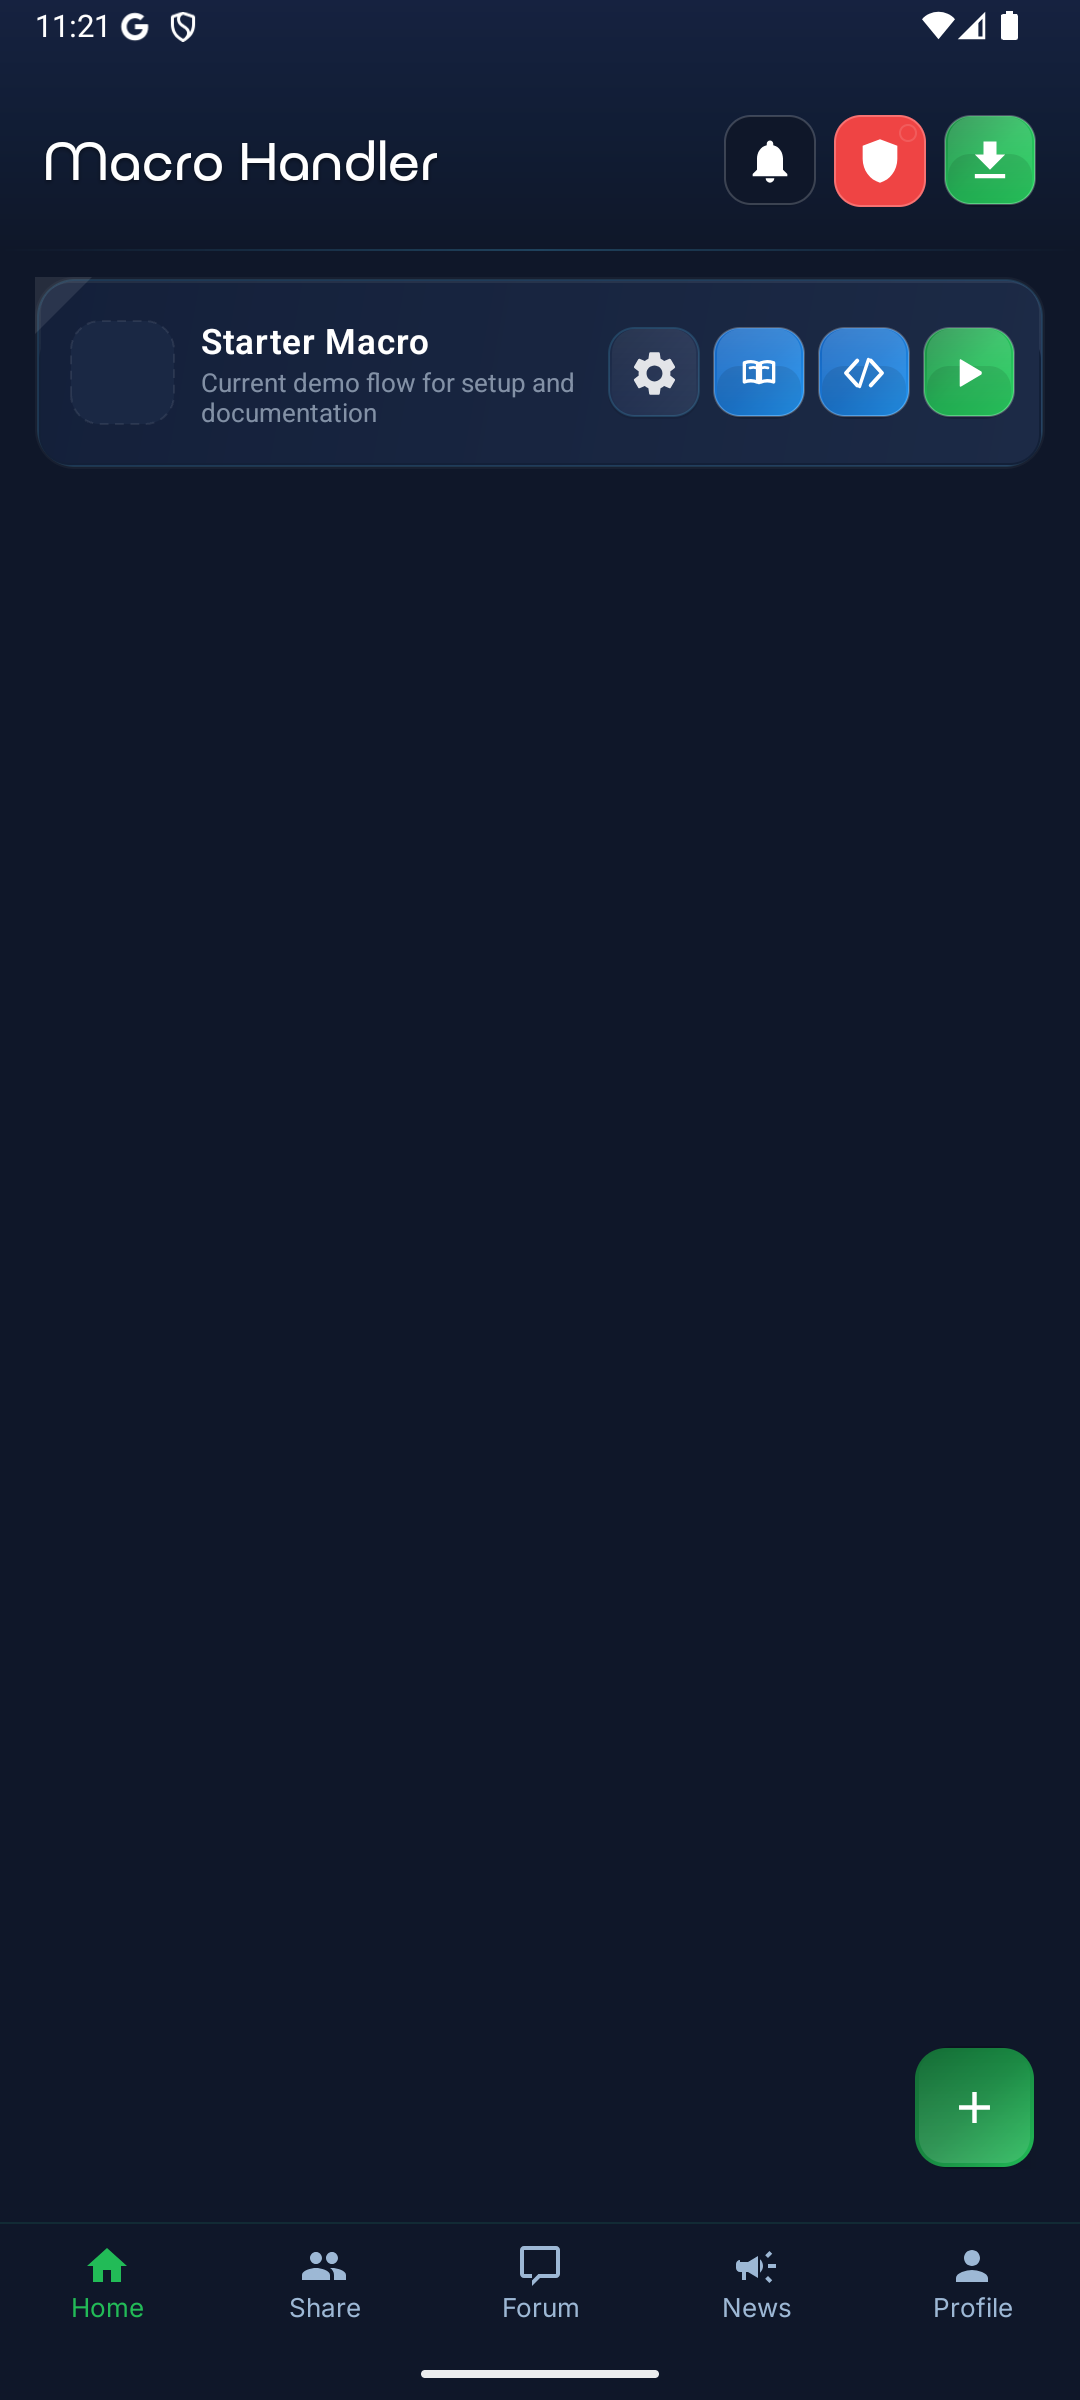
Create Your First Macro
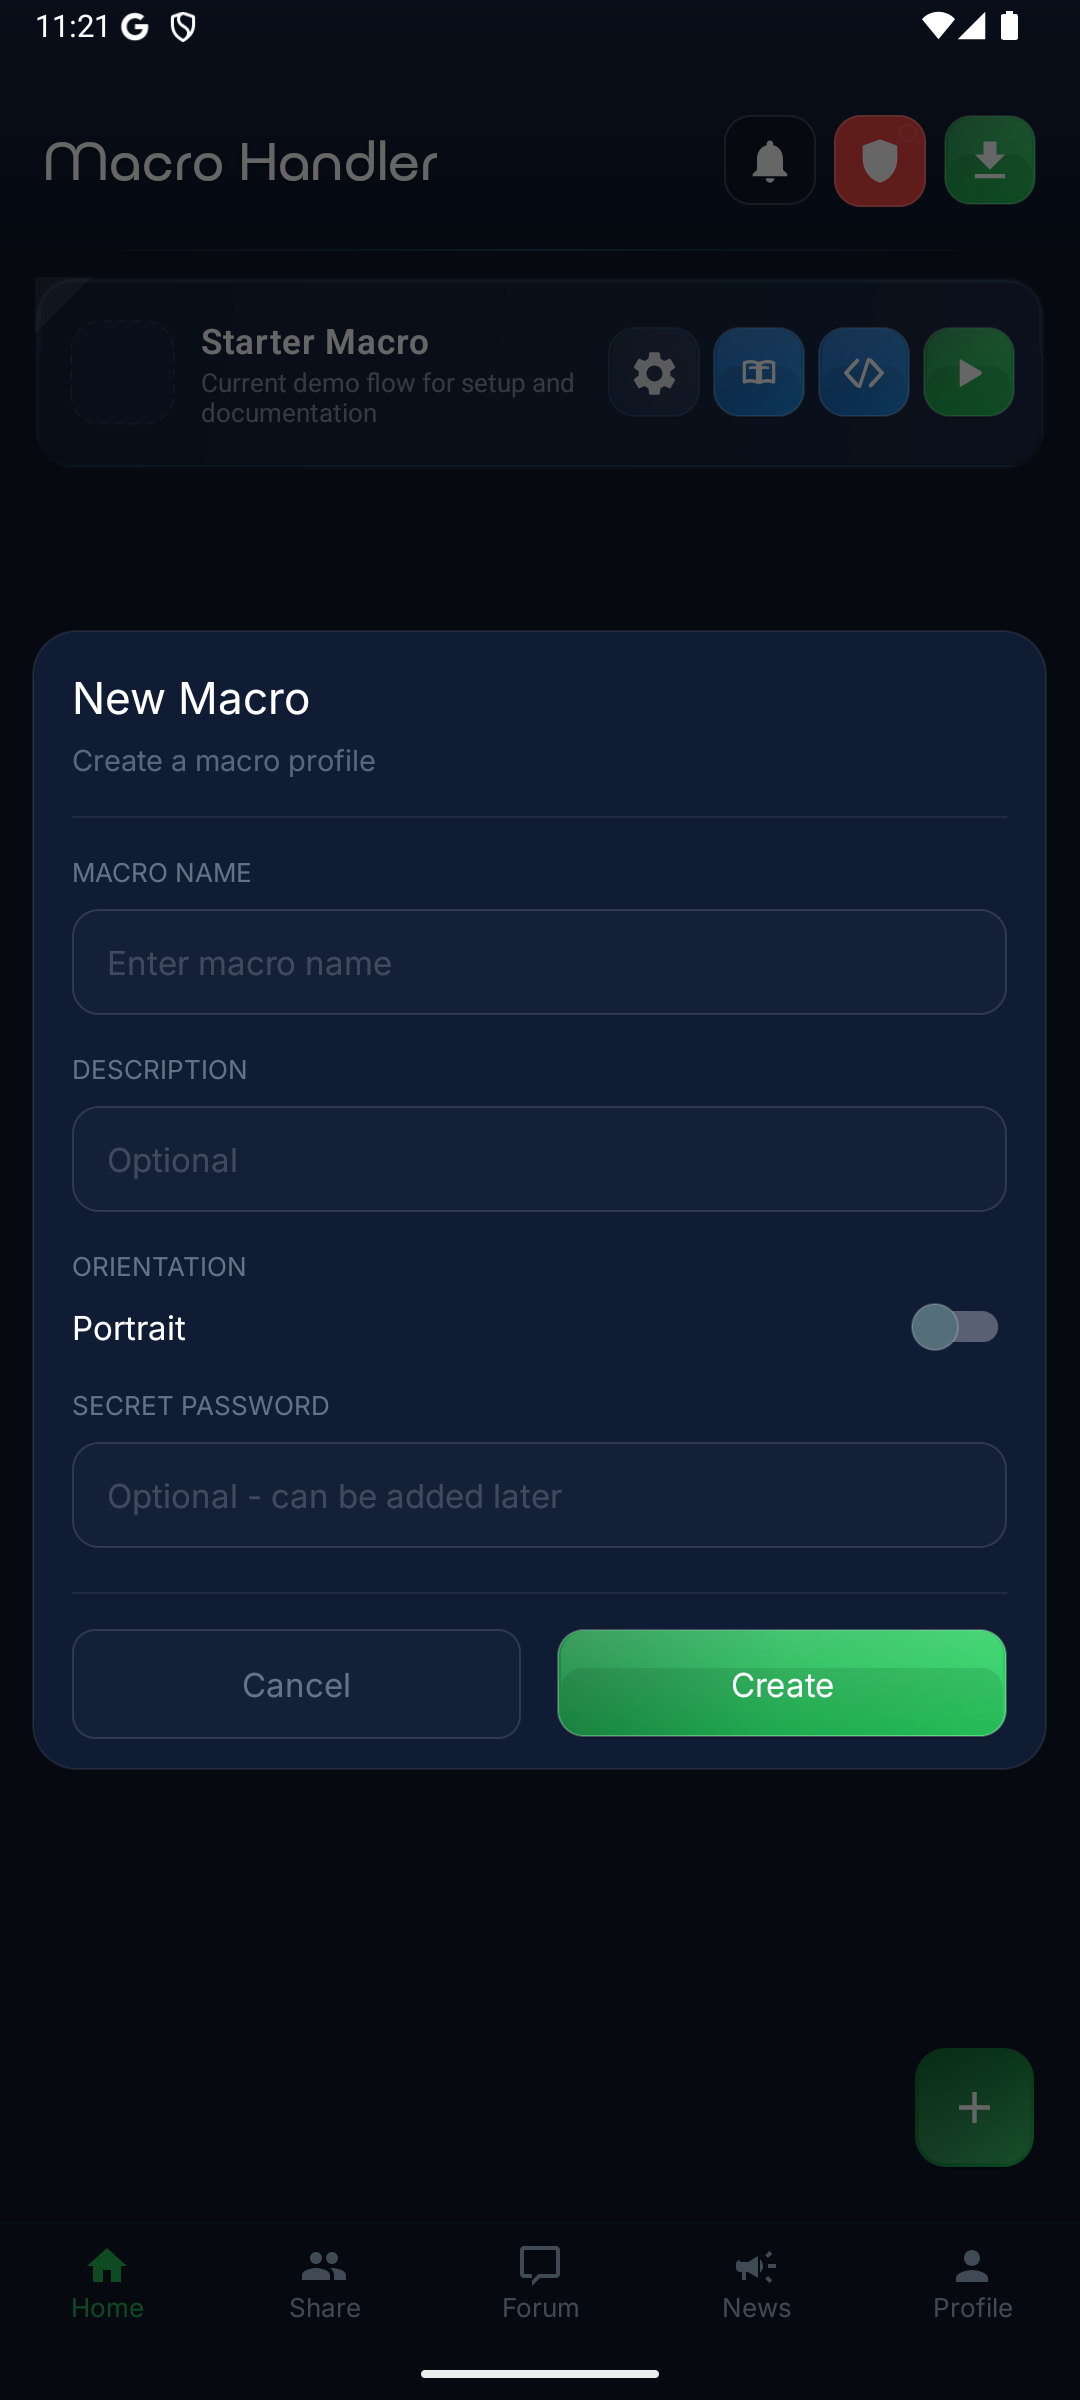
Tap the + button on the main screen to create a new macro. Give it a descriptive name, choose screen orientation, and optionally add a secret password to restrict access to the macro. Created macros will appear in the list on the main screen.
- Macro Name: Give a descriptive name for your macro. This name will appear in the main screen list.
- Orientation: Portrait or Landscape. Landscape is usually chosen for game macros.
- Secret Password: Add a password to restrict access to the macro or its shared package.
Dashboard
New Macro
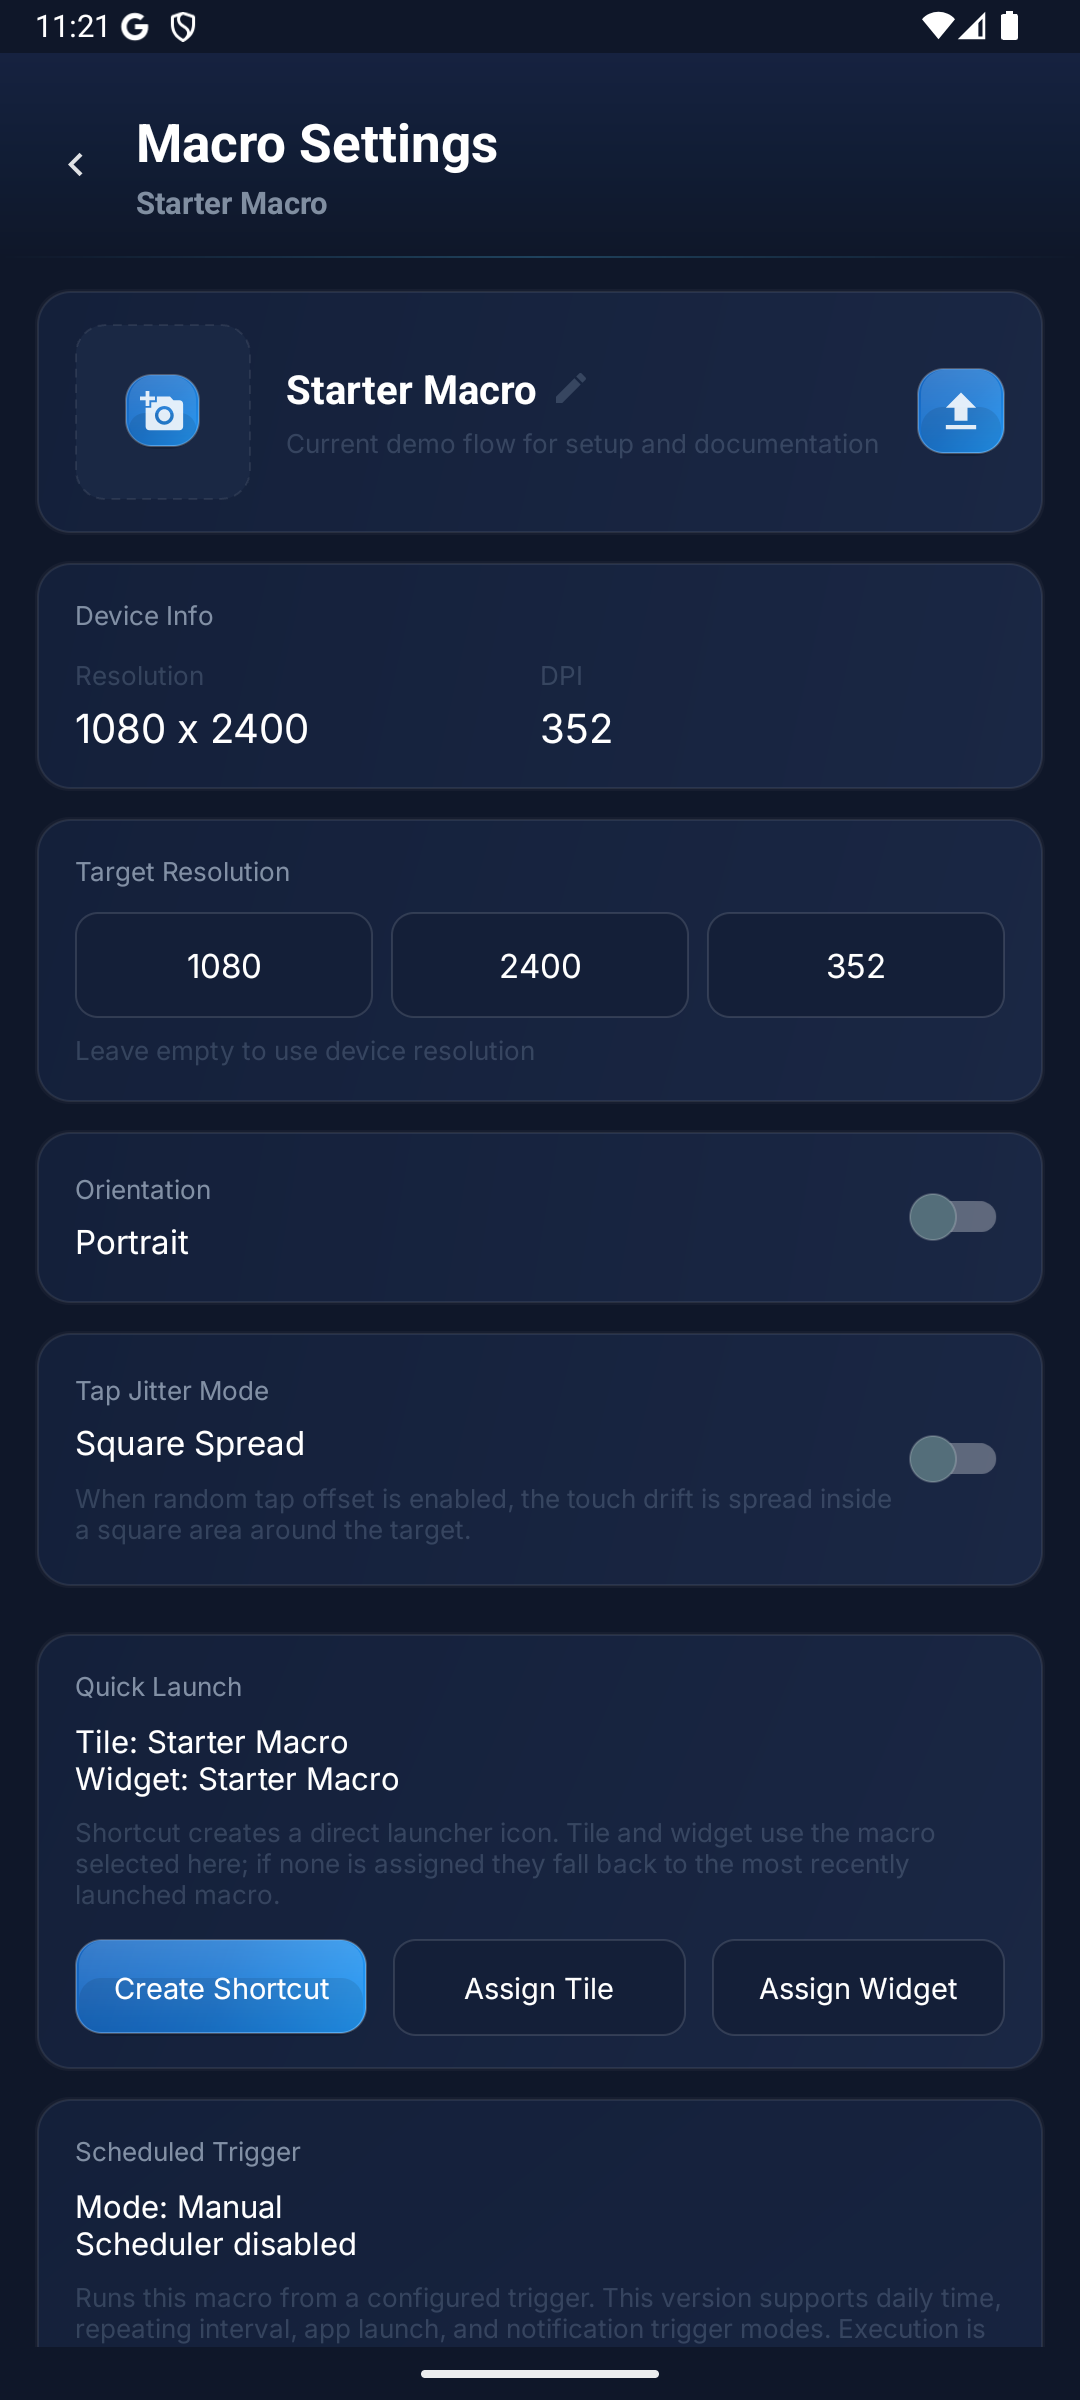
Configure Macro Settings
Configure device resolution, target resolution, and coordinate mode for your macro to work correctly across different devices. These settings ensure that coordinates are calculated correctly on different screen sizes.
- Device Info: Resolution and DPI auto-detected. No need to change manually.
- Target Resolution: Defines which resolution the macro is designed for. Important for sharing.
- Sharing: Distribute the macro through the managed sharing flow; time limits and play-only restrictions stay enforced.
Macro Settings
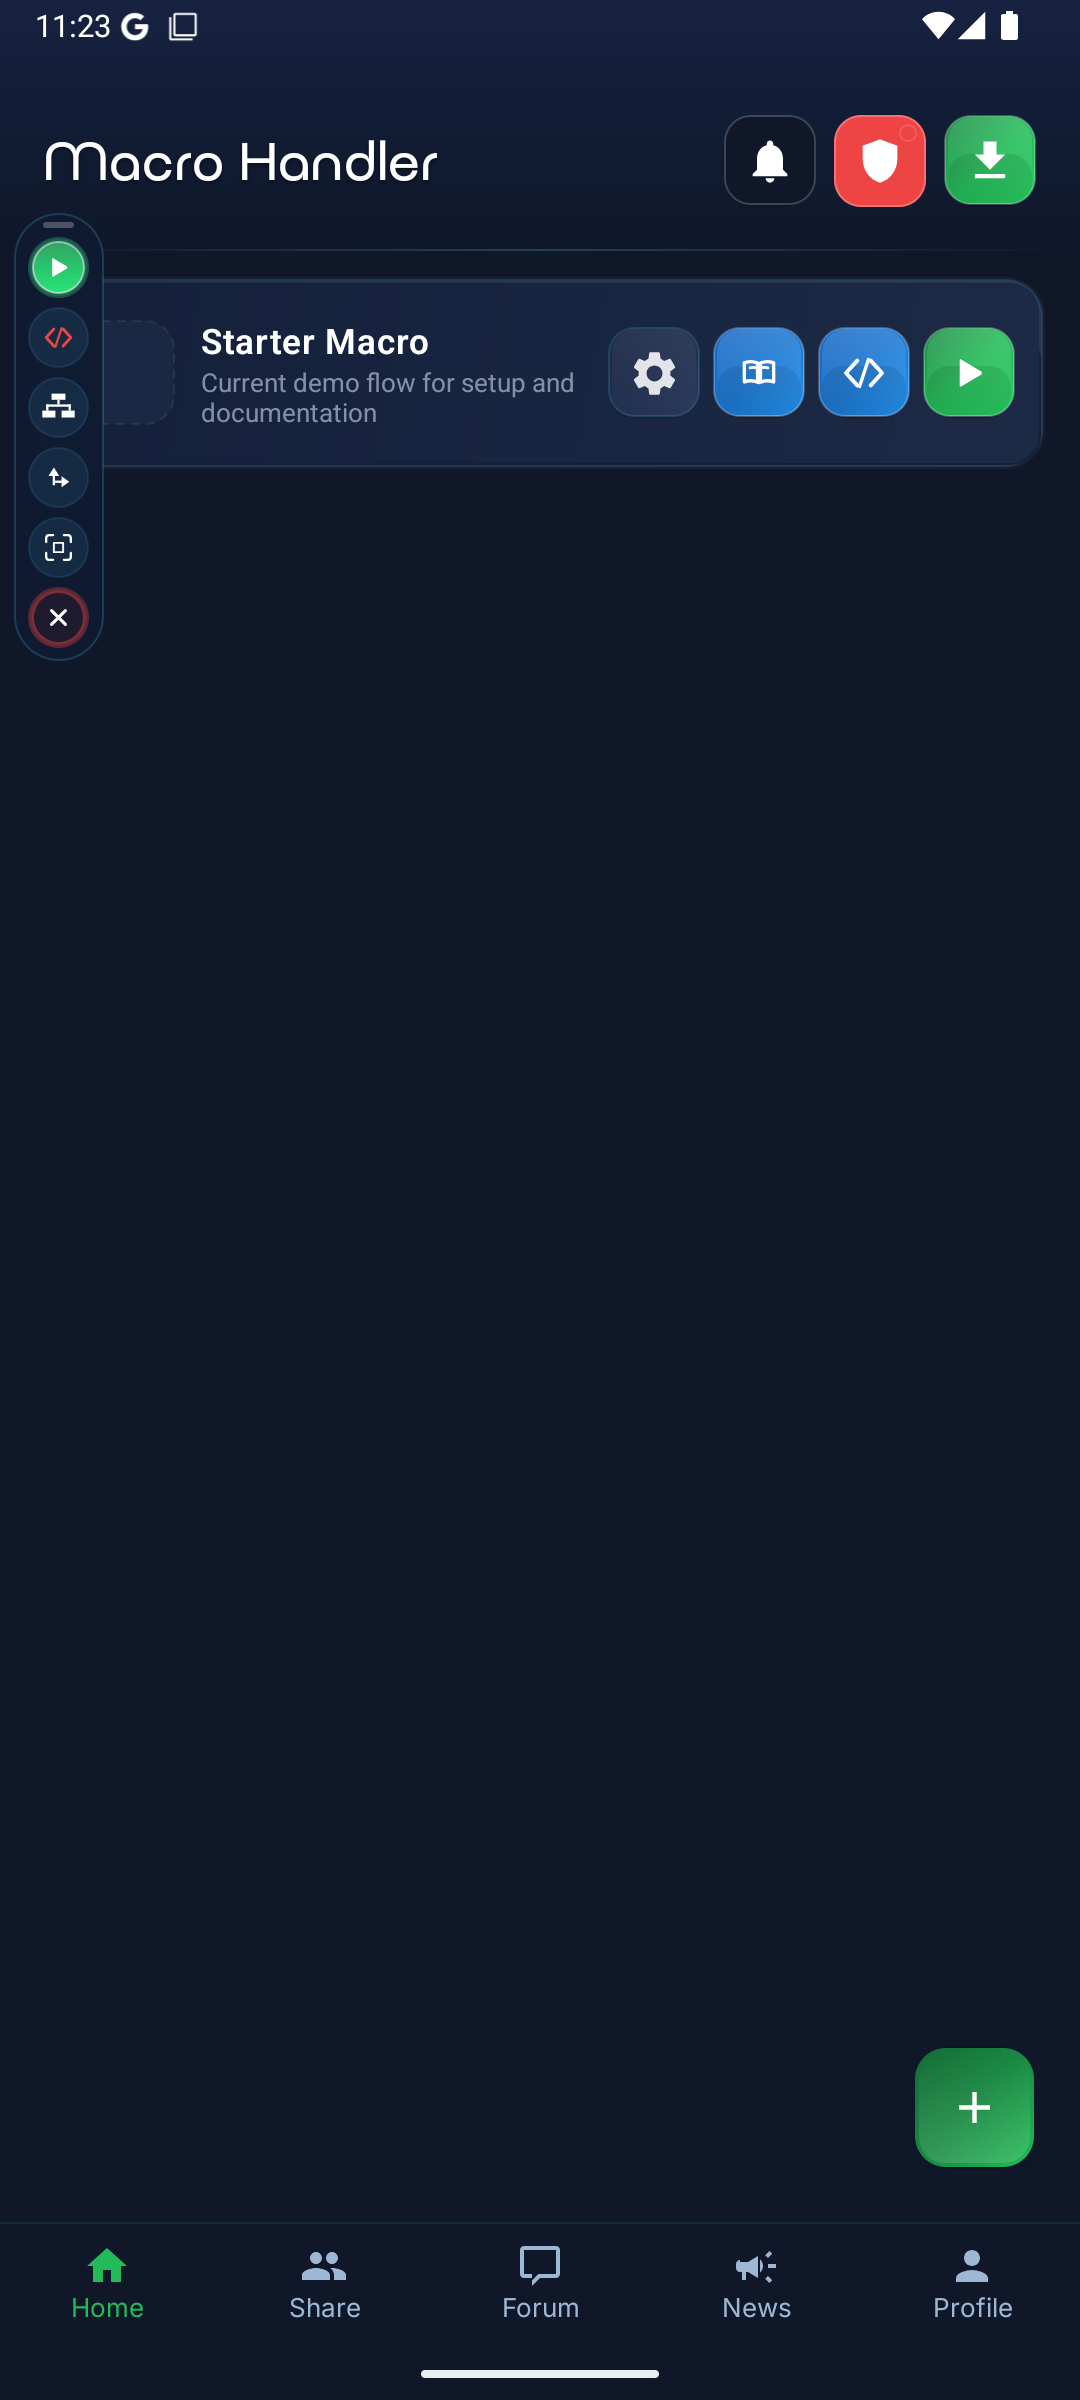
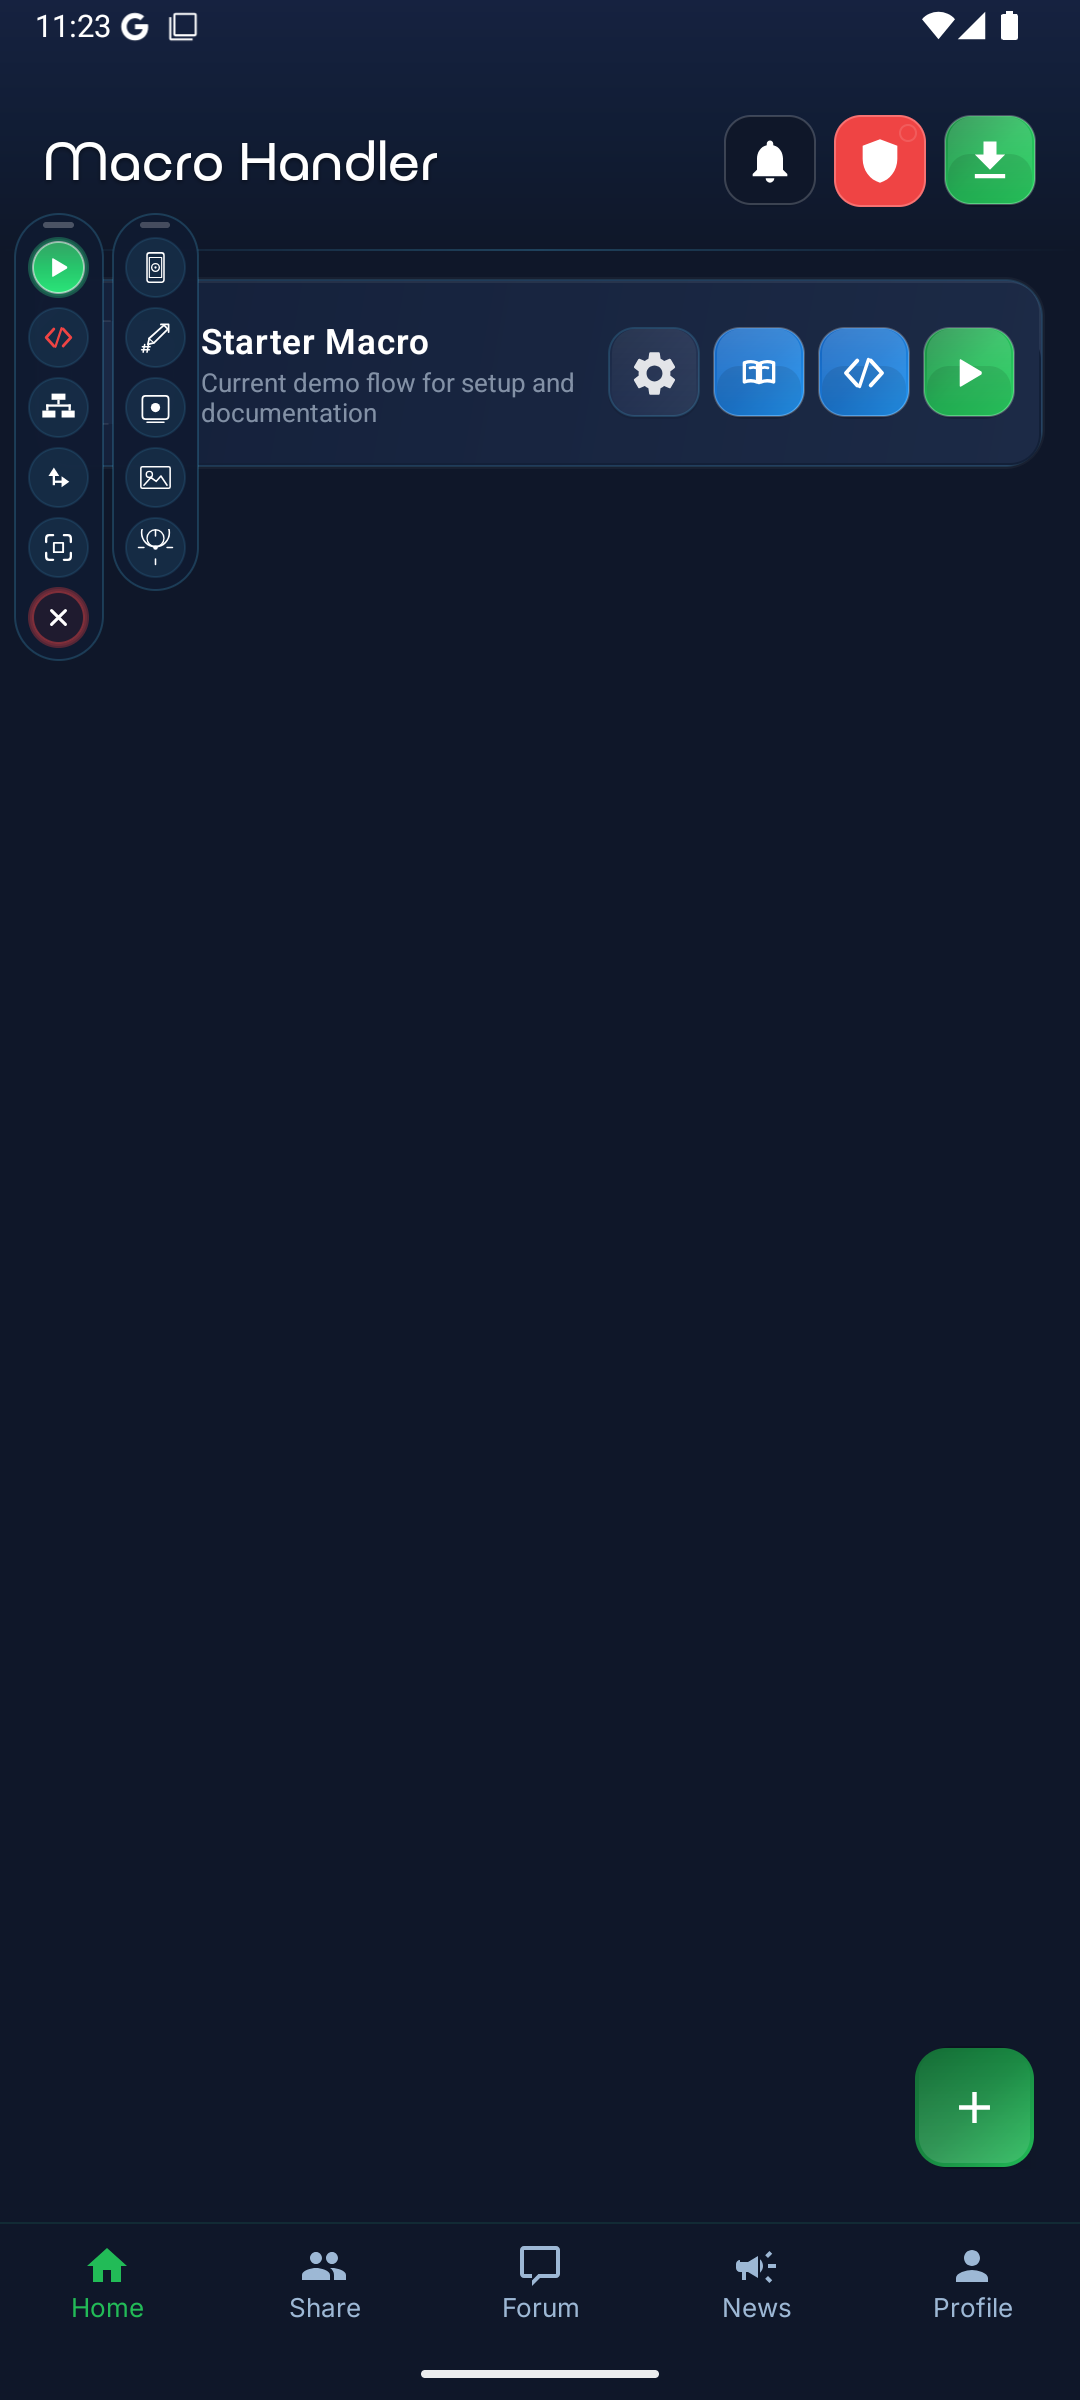
Run with Control Panel
When you press Play, a floating control panel appears on screen. The primary rail on the left keeps macro start, stop, and quick tool access available. When the helper tray opens, screenshot, color picker, region picker, and similar working tools appear in a second compact drawer.
- Primary Rail: It stays pinned to the left edge so you can start the macro, stop it, and move between essential tools.
- Helper Drawer: It opens helper actions such as the code editor, screenshot capture, color picker, region picker, and template gallery.
- Placement: The panel stays above any app and is designed for minimization, repositioning, and quick access while the device is in motion.
- Run Mode: Even while the macro is running, you can return to the same panel and re-check the flow through the helper tools.
Main Panel
Helper
Main Panel View
The first capture shows the active macro card together with the fixed command rail on the left. This is the main panel that keeps the current macro in focus.
Helper Panel View
The second capture shows the helper drawer in its expanded state. Screenshot, picker, and utility buttons live in this layer.
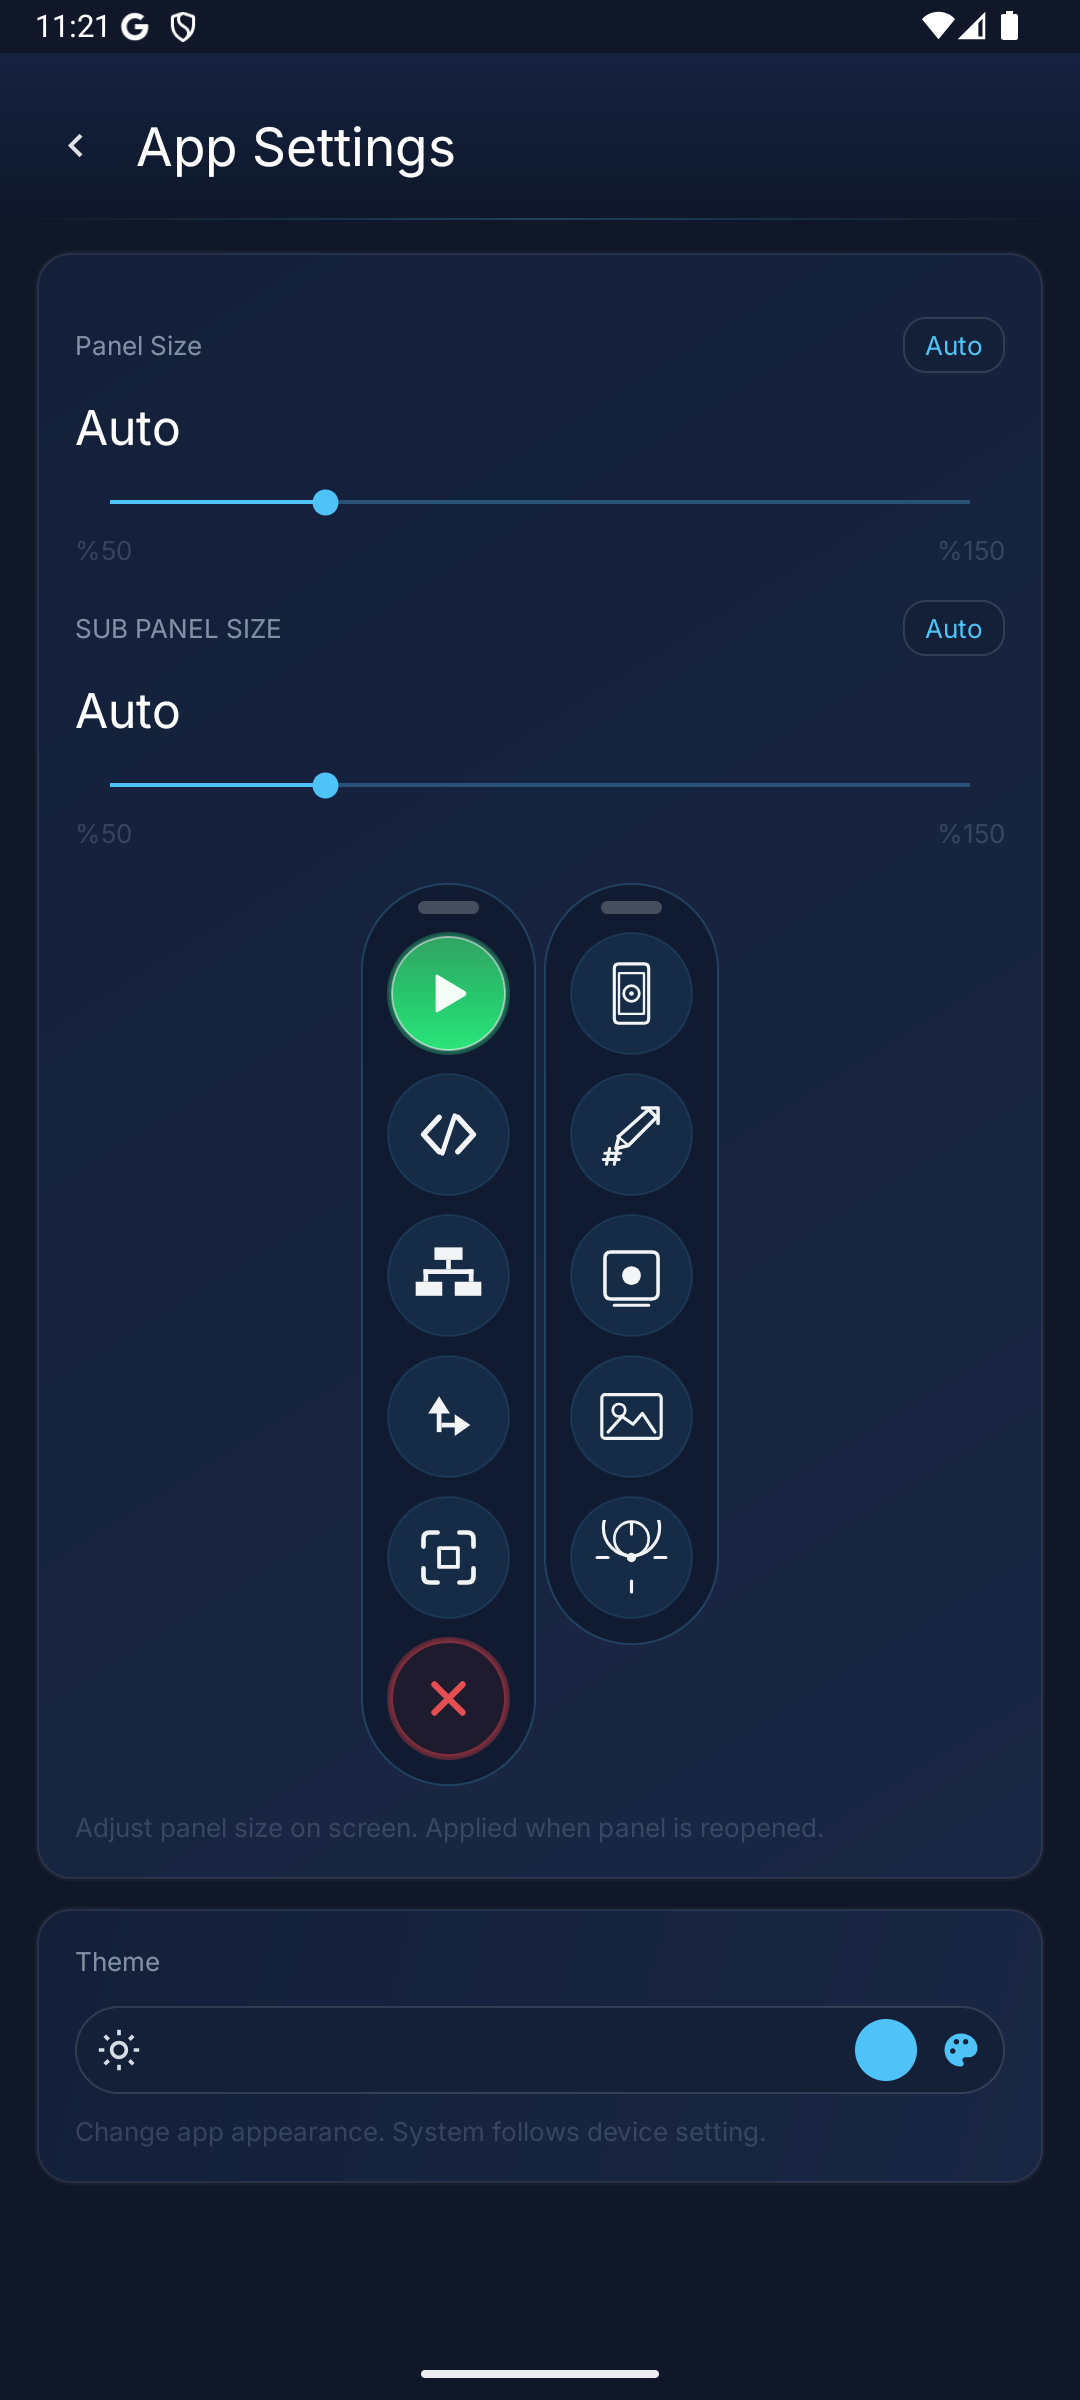
App Settings
Configure the floating control panel size, app theme, language preference, and other general settings from the Settings tab. These settings apply to all your macros.
- Panel Size: Adjustable between 50%-150%.
- Theme: System, Light, or Dark.
- Language: 14 languages are selectable on both the website and the Android app settings. The website and Android app start in English on first open, and users can switch to their preferred language at any time.
App Settings
Battery Optimization (OEM Settings)
Some manufacturer software (Samsung, Xiaomi, OnePlus, etc.) aggressively restricts background apps. Without these settings, long macros may silently stop or end when the device enters sleep mode.
Background Guidance
OEM Checklist
Step 1
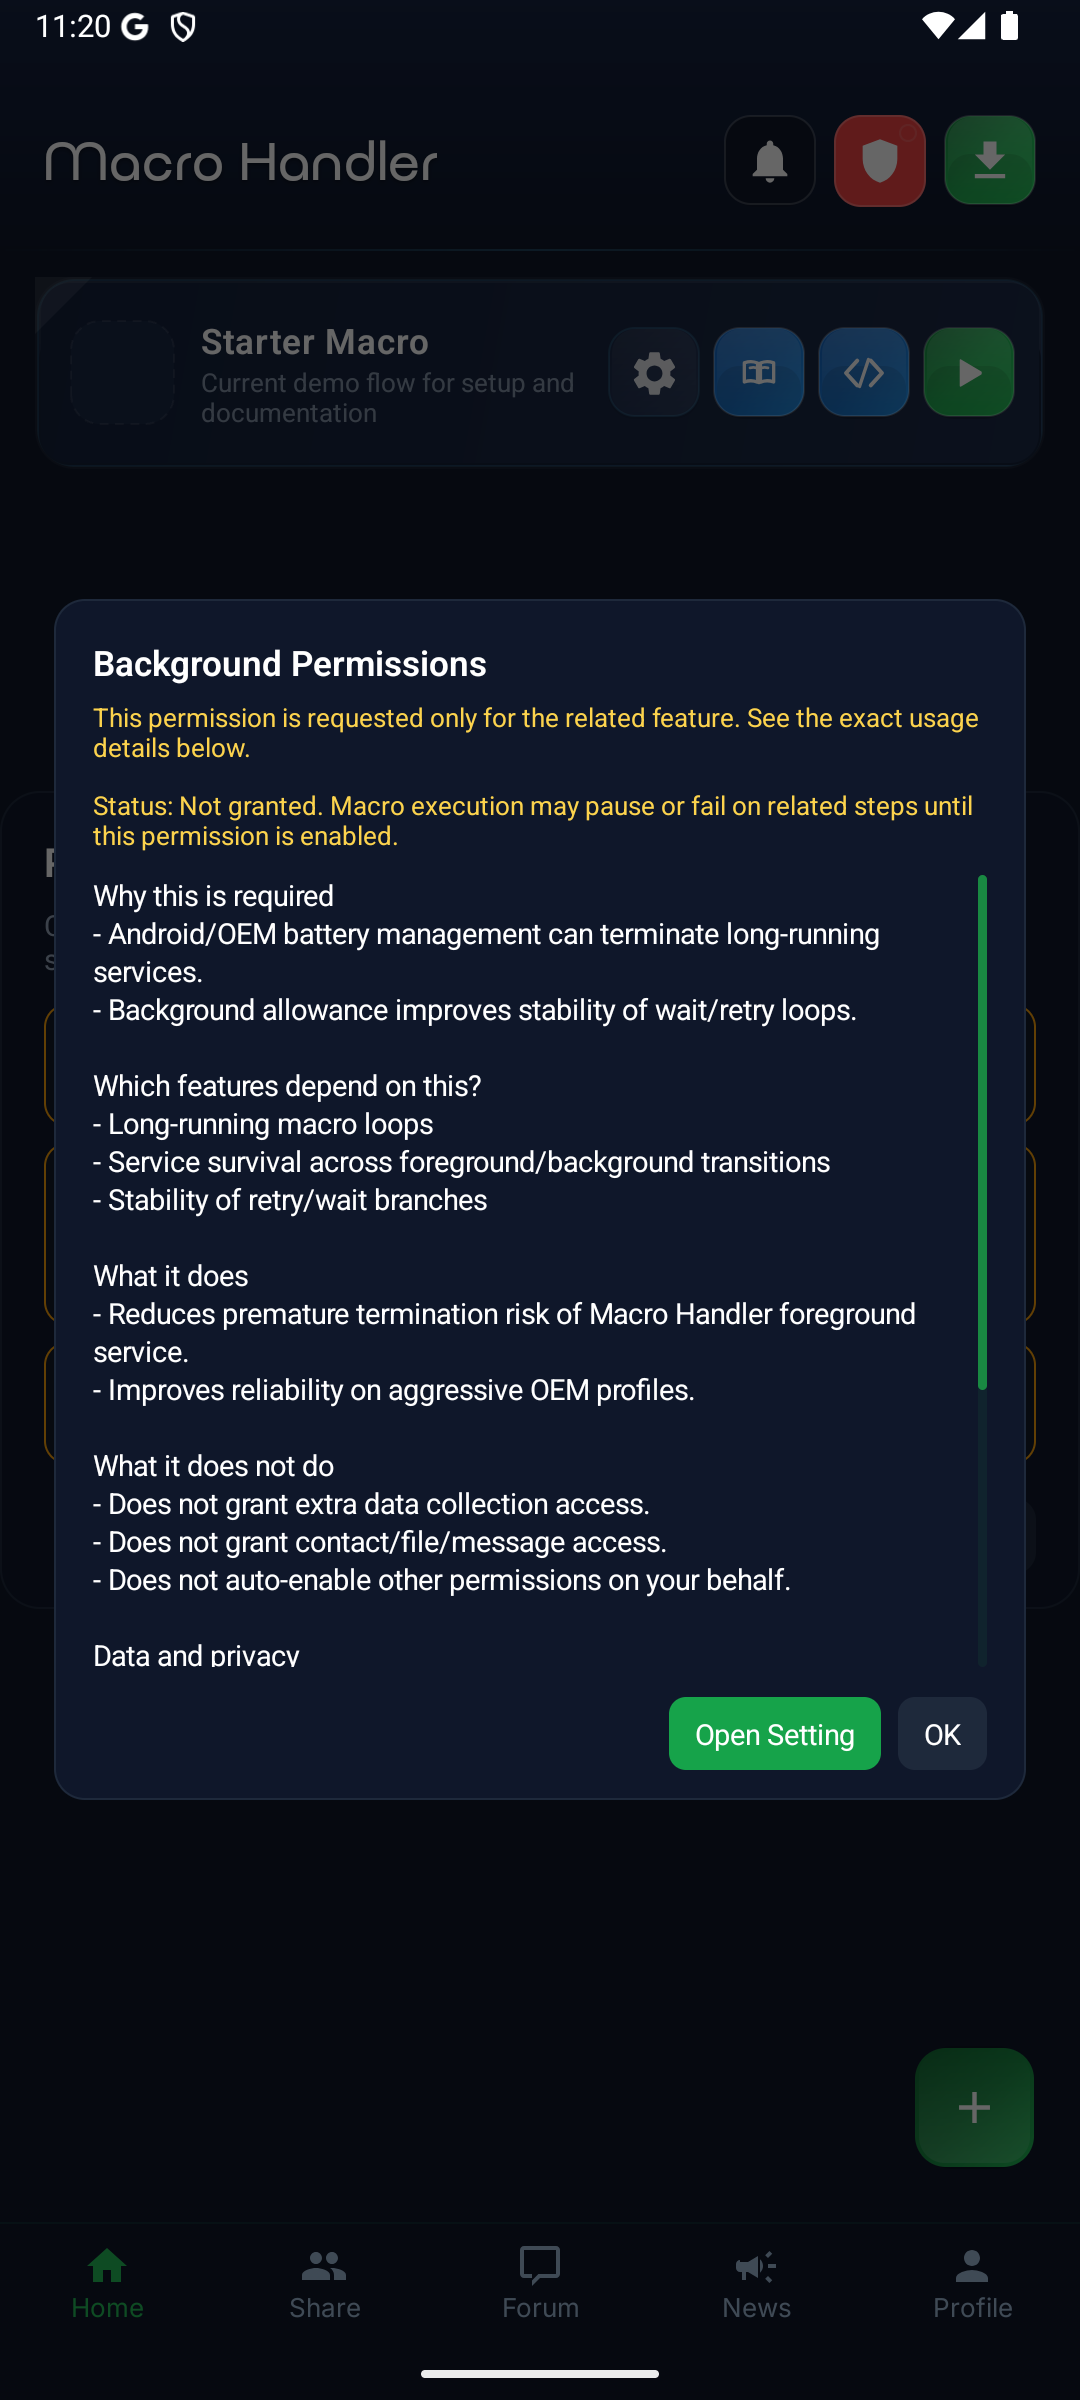
Background Protection Guidance
The first capture shows the detailed in-app guidance that explains why background protection matters. It lets you see which permission or OEM-specific step is still missing before you leave the app.
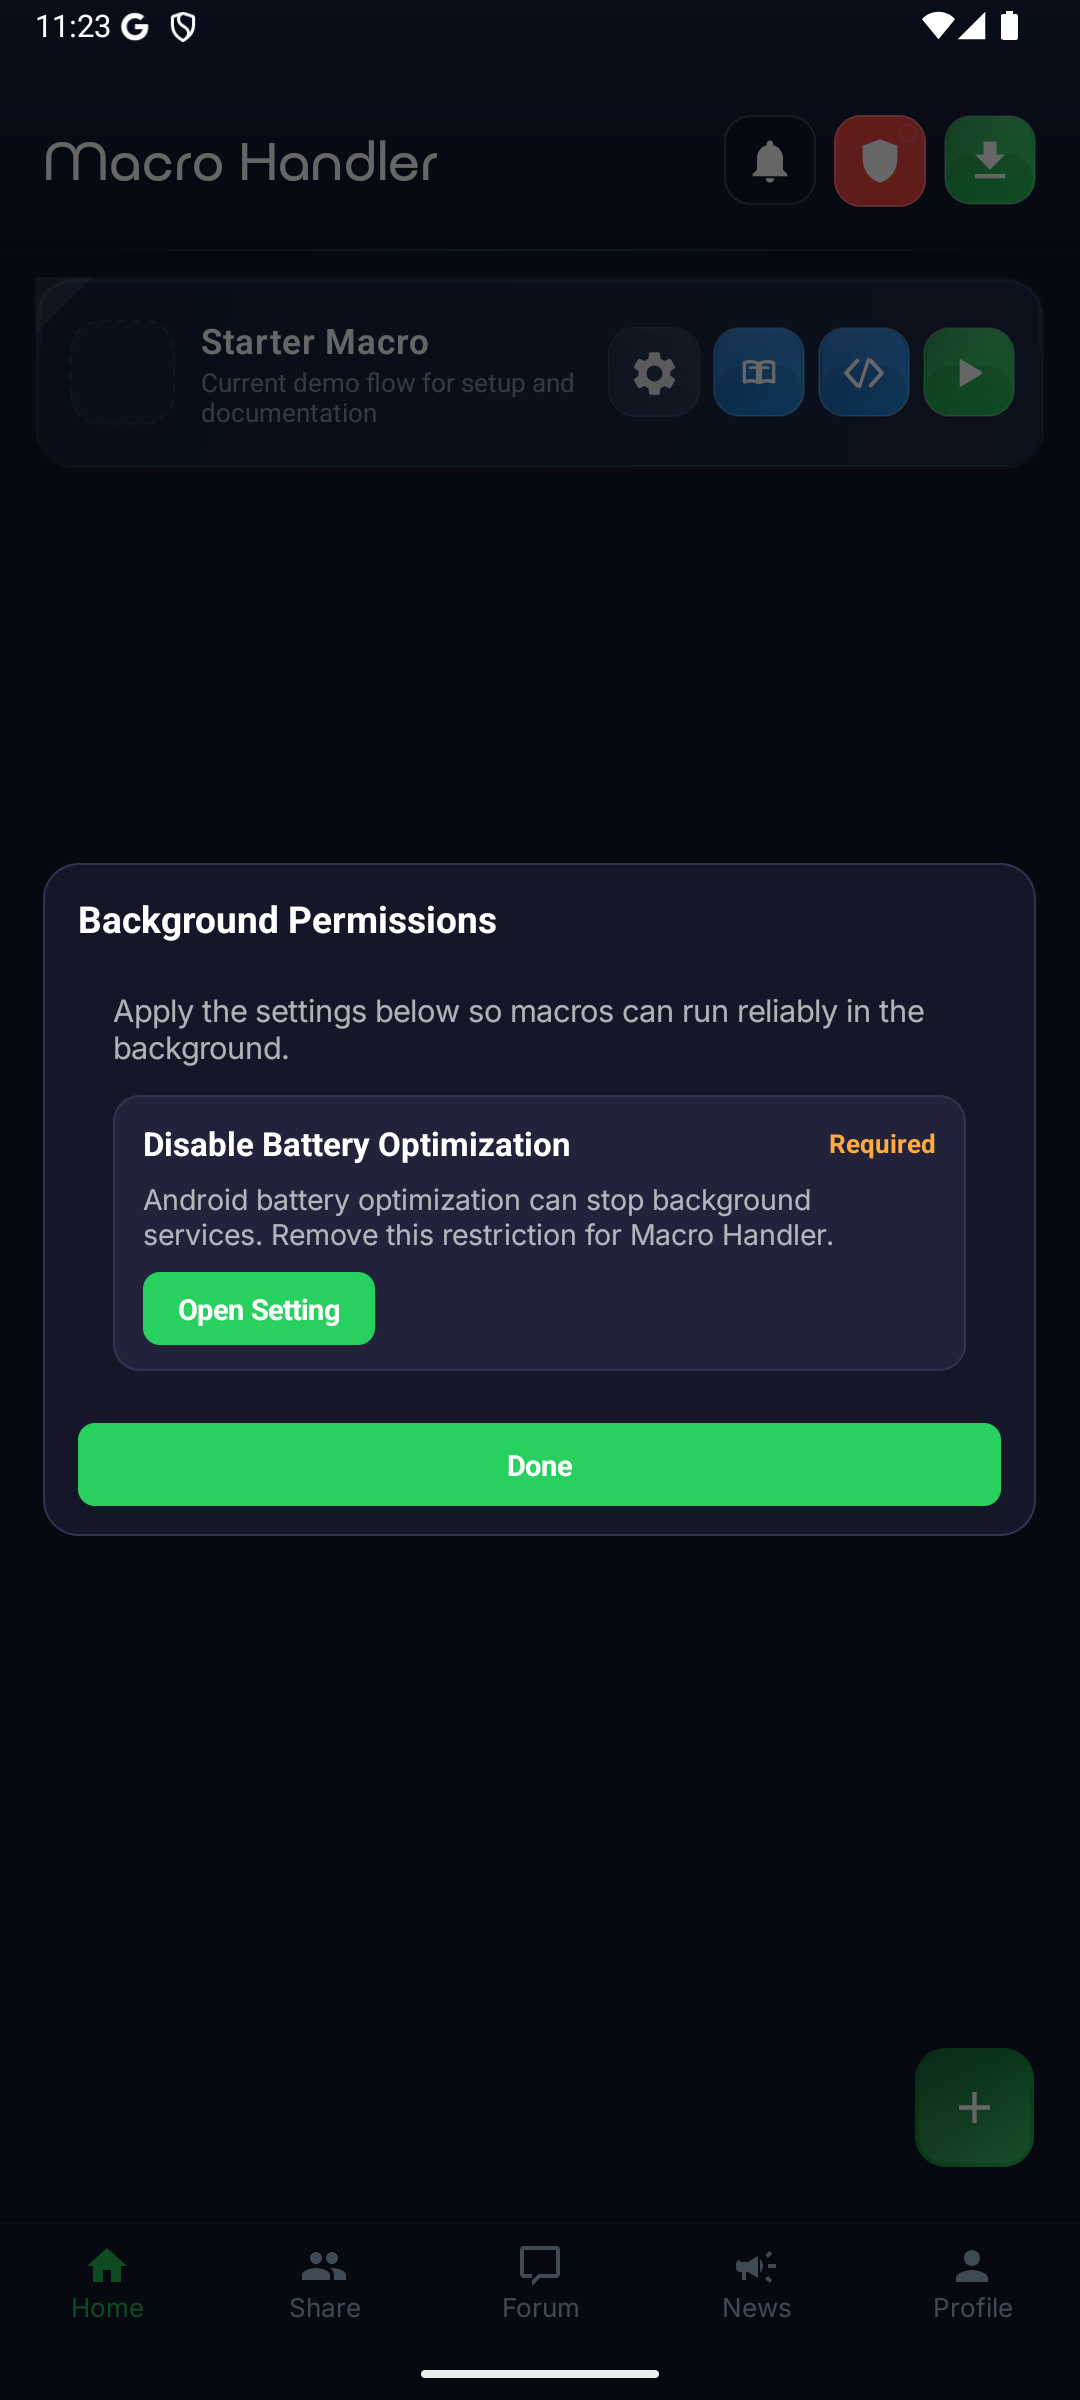
Step 2
Complete the OEM Checklist
The second capture shows the OEM battery and background checklist inside Macro Handler. The "Open" buttons take you to the required Android or manufacturer page; on your device, enable wording such as "Unrestricted", "No restrictions", or "Allow background use".
Android (Standard)
- 1Settings -> Apps -> Macro Handler
- 2Battery -> Select "Unrestricted"
- 3Set Macro Handler battery mode to "Unrestricted"
Samsung (One UI)
- 1Settings -> Battery -> Background usage limits
- 2Remove Macro Handler from "Sleeping apps" and "Deep sleeping apps" lists
- 3Settings -> Battery -> More battery settings -> Enable "Allow apps not optimized"
Xiaomi / MIUI / HyperOS
- 1Settings -> Apps -> Manage apps -> Macro Handler
- 2Autostart: ON
- 3Battery saver -> Select "No restrictions"
- 4Security -> Permissions -> Autostart: Enable Macro Handler
OnePlus / Oppo (OxygenOS / ColorOS)
- 1Settings -> Battery -> App battery management
- 2Macro Handler -> Select "Allow background activity"
Huawei (EMUI)
- 1Settings -> Battery -> App launch
- 2Macro Handler -> Disable automatic management -> Manually enable "Auto-launch", "Secondary launch", and "Run in background"
General Tip
For macros running several hours, keep your device plugged in. Low-battery restrictions are reduced while charging. The app guides you to battery optimization settings and OEM-specific background controls; completing those steps is important for long-running macros.